本章我们介绍对设备进行初始化配置。在系统运行前,我们需要连接到wifi,连接到O2OA服务器,并以某个用户的身份登录到服务器,如果这些信息是在程序里写死的,那是很不合适的,所以我们必须有方法允许用户对设备的连接和登录信息进行初始化设置并随时可以更改。
我们通过启动一个AP接入点,并启动一个web服务,通过任何其他浏览器来对我们的设备进行配置。
创建项目文件
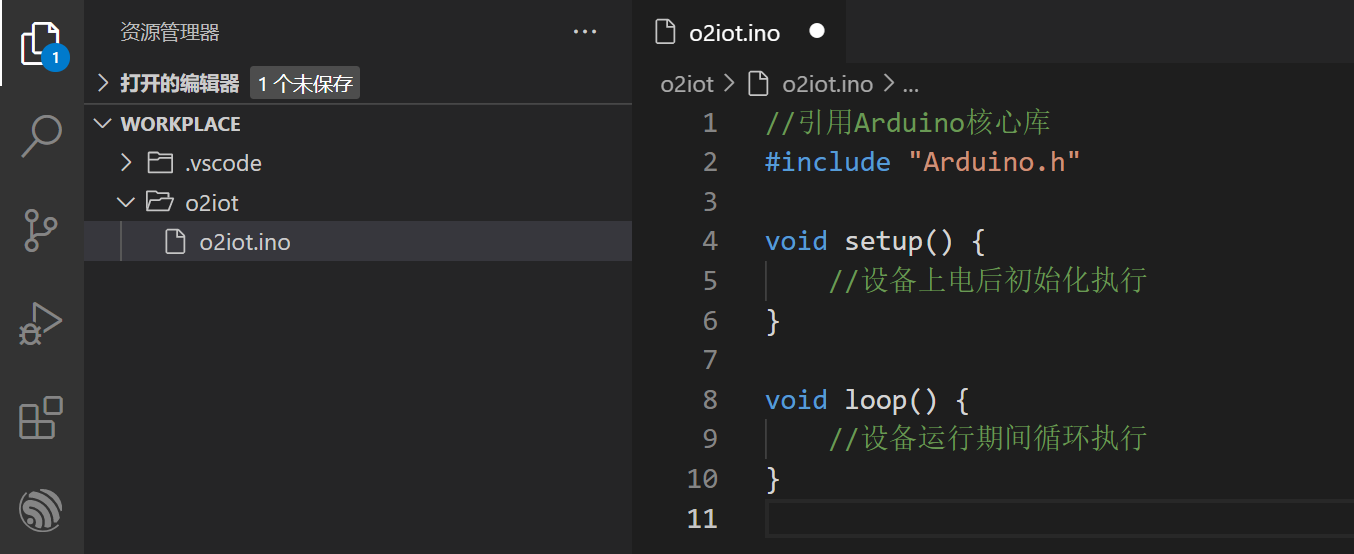
在VS Code中创建一个工作区,在工作区中创建一个文件夹:“o2iot”。然后再此文夹下创建文件:“o2iot.ino”文件,并输入以下代码:
//引用Arduino核心库 void setup() { //设备上电后初始化执行 } void loop() { //设备运行期间循环执行 }
此时,工作区右下角出现几个选项

点击“Select Board Types”,选择合适的开发板类型,此处我选择“LOLIN(WEMOS) D1 R2 & mini (esp8266)”(可以根据使用的不同开发板选择)
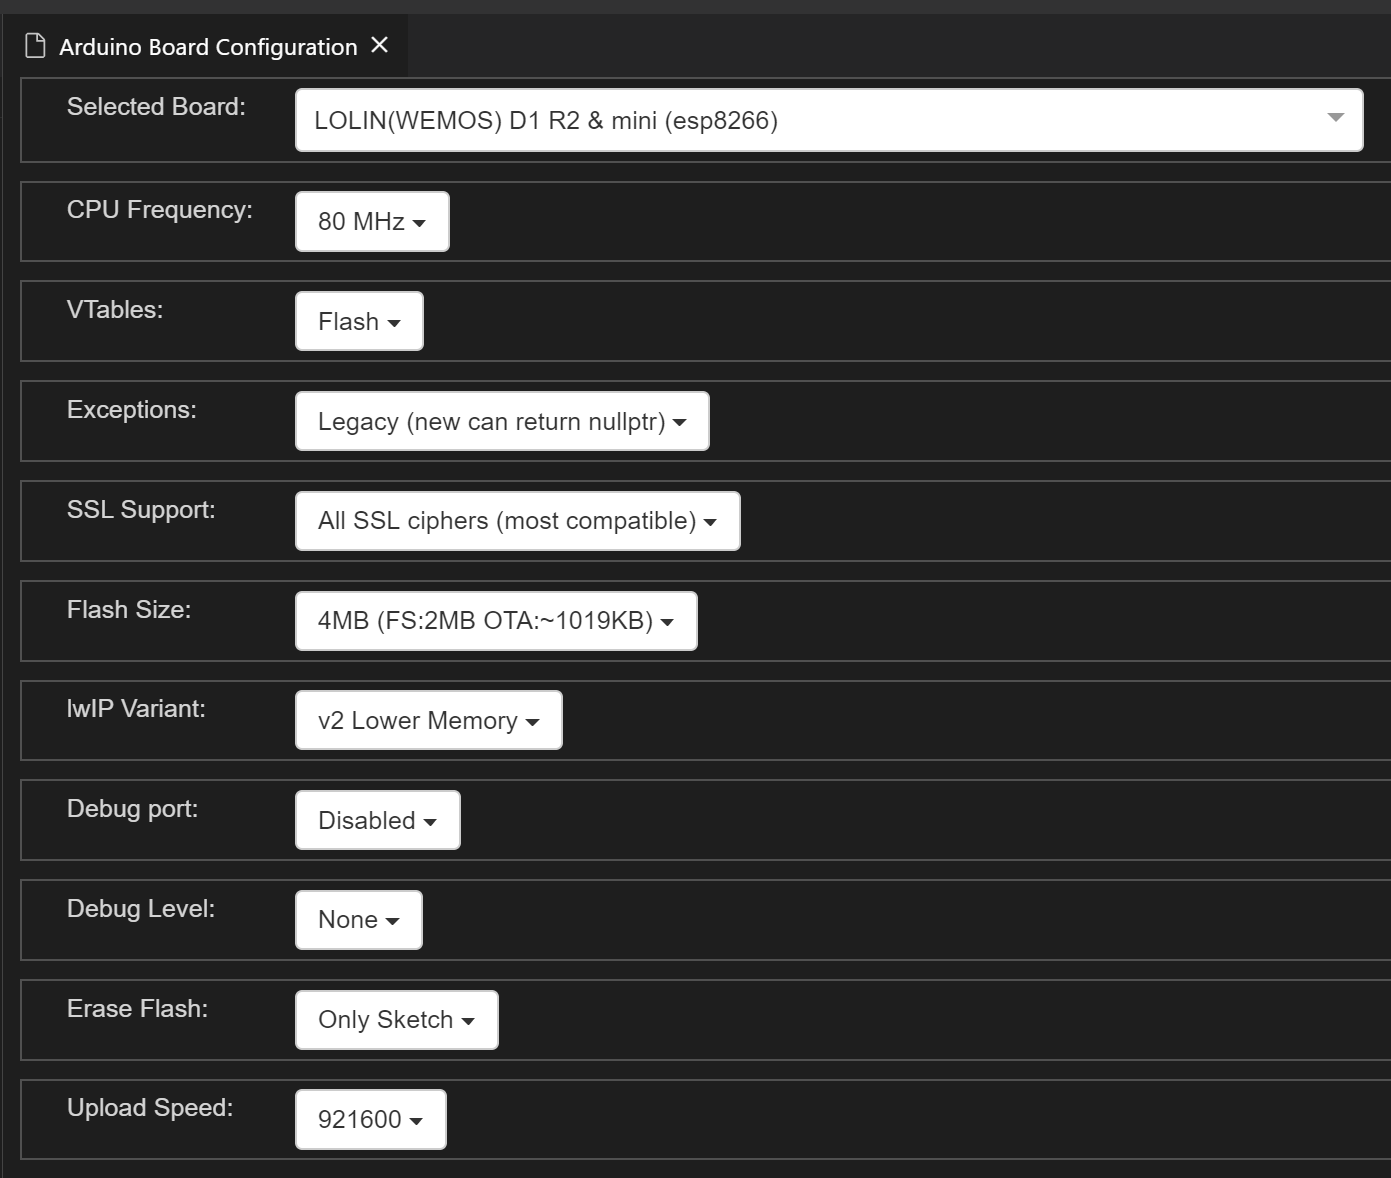
点击“Select Serial Port”选择开发板连接的COM口,可以在我们需要上载程序到开发板时再选择。
在.ino文件窗口的右上角,我们发现有两个按钮:分别用于上载程序到开发板和验证程序:

创建O2IOTServer类
我们要使ESP8266启用AP模式,并响应web服务,用于设置要连接的wifi,O2OA服务器的地址,登录用户等信息,完成设备的初始化,所以我们先创建O2IOTServer类,完成此功能。
在o2iot目录下创建文件:O2IOTServer.h,代码如下:
//引入ESP8266的webserver,用于创建web服务器 //引入ESP8266的WiFi,用于创建AP接入点 //Arduino核心库,初始化信息需要存入EEPROM存储器中 //接入点名称 //接入点默认密码 class O2IOTServer { public: bool begin(); //开始web服务 void listening(); //监听http请求 //初始化配置信息变量 String o2host=""; String o2port=""; String o2user=""; String o2pass=""; char *ssid_name; char *ssid_pass; //从EEPROM中获取配置信息 void getConfig(); //解析配置信息 void parseConfig(); private: static ESP8266WebServer *_server; //webserver对象 static ESP8266WiFiScanClass *_wifiScan; //wifi扫描对象,用于扫描可用的wifi热点 static void _bindService(); //将http请求的不同路径,绑定到不同的方法 static void _setConfig(); //将获取到的配置信息,写入EEPROM存储器 static void _handleRoot(); //当http访问路径为“/”时响应 static void _handleSet(); //当http访问路径为“/config”时响应 static char _ssidConfig[128]; //配置信息存储128字节 }; extern O2IOTServer O2_IOTServer; /* O2IOTSERVER_H_ */
然后我们需要创建.cpp来实现头文件中定义的方法,所以在o2iot目录下创建文件:O2IOTServer.cpp,代码如下:
//初始化WebServer端口为80 ESP8266WebServer* O2IOTServer::_server = new ESP8266WebServer(80); ESP8266WiFiScanClass* O2IOTServer::_wifiScan; char O2IOTServer::_ssidConfig[128]; bool O2IOTServer::begin() { EEPROM.begin(512); //ESP8266使用EEPROM需要首先调用EEPROM.begin(size)方法 if (WiFi.softAP(AP_SSID, AP_PASSWORD)) { //通过默认的AP名称和密码启动接入点. _bindService(); //将http请求的不同路径,绑定到不同的方法 _server->begin(); //启动Web服务器 return true; }else { return false; } } void O2IOTServer::listening() { _server->handleClient(); //监听http请求 } void O2IOTServer::_bindService(){ _server->on("/", _handleRoot); //将http请求路径"/",通过_handleRoot方法响应 _server->on("/config", _handleSet); //将http请求路径"/config",通过_handleSet方法响应 } //当http请求路径"/"时,显示的html信息 //创建了一个超链接,“set you config”,点击时访问/config void O2IOTServer::_handleRoot(){ String content = "<html><meta content='width=device-width, initial-scale=1.0, maximum-scale=1.0, user-scalable=0' name='viewport' />"; content += "<meta content='yes' name='apple-mobile-web-app-capable' />"; content += "<meta content='black' name='apple-mobile-web-app-status-bar-style' />"; content += "<meta content='telephone=no' name='format-detection' />"; content += "<body><H2>hello, you successfully connected to O2IOT</H2><br>"; content += "You can access this page <a href=\"/config\">set you config</a></body></html>"; _server->send(200, "text/html", content); } //当http请求路径"/config"时,显示的html信息 void O2IOTServer::_handleSet(){ char ept = '\0'; //如果请求信息包含配置信息参数,说明是提交配置信息 if (_server->hasArg("ssid") && _server->hasArg("pass") && _server->hasArg("o2user") && _server->hasArg("o2pass") && _server->hasArg("o2host") && _server->hasArg("o2port")) { String config = _server->arg("ssid") + "|" + _server->arg("pass")+ "|" + _server->arg("o2user")+ "|" + _server->arg("o2pass")+ "|" + _server->arg("o2host")+ "|" + _server->arg("o2port"); int len = config.length(); //将配置信息使用"|"符号分隔后,存入_ssidConfig中 for (int i = 0; i < 128; i++) { if (len > i) { _ssidConfig[i] = config.charAt(i); }else { _ssidConfig[i] = ept; } } //返回html,提示用户配置信息已经收到 String rStr = "<html><meta content='width=device-width, initial-scale=1.0, maximum-scale=1.0, user-scalable=0' name='viewport' />"; rStr += "<meta content='yes' name='apple-mobile-web-app-capable' />"; rStr += "<meta content='black' name='apple-mobile-web-app-status-bar-style' />"; rStr += "<meta content='telephone=no' name='format-detection' />"; rStr += "<meta http-equiv='Content-Type' content='text/html; charset=UTF-8' />"; rStr += "<body><div style='text-align:center; font-size: 16px; margin-top:100px'>您已经更改了设置,正在重新连接... </div></body>"; _server->send(200, "text/html", rStr);; //将配置信息写入到EEPROM中 _setConfig(); return; } //如果请求信息没有包含配置信息,则让用户填写配置信息。 //填写完成点击submit按钮,将信息提交到"/config"。 //通过_wifiScan对象,扫描所有可用的wifi热点 int n = _wifiScan->scanNetworks(); //响应的html内容 String content = "<html><head><meta content='width=device-width, initial-scale=1.0, maximum-scale=1.0, user-scalable=0' name='viewport' />"; content += "<meta content='yes' name='apple-mobile-web-app-capable' />"; content += "<meta content='black' name='apple-mobile-web-app-status-bar-style' />"; content += "<meta content='telephone=no' name='format-detection' /></head>"; content += "<body><form action='/config' method='POST' onsubmit='return check();'>input your wifi ssid and password<br>"; content += "select ssid:<!--<input type='text' name='ssid1' placeholder='ssid name'>--><br>"; //列出所有可用热点,让用户选择 for (int i = 0; i < n; i++) { uint8_t x = i; String n = _wifiScan->SSID(x); content += "ssid:<input type='radio' name='ssid' value='"+ n +"'>"+ n +"<br>"; } content += "input wifi password:<input type='password' name='pass' placeholder='password'><br>"; content += "<hr>"; //从EEPROM获取已有的配置信息 //回填到下面需要用户配置的O2服务器域名、端口、登录用户名和密码 O2_IOTServer.getConfig(); O2_IOTServer.parseConfig(); String port = O2_IOTServer.o2port; if (port.equalsIgnoreCase("")) port="20030"; content += "input o2Server center host:<input type='text' name='o2host' placeholder='input o2 host' value='"+O2_IOTServer.o2host+"'><br>"; content += "input o2Server center port:<input type='text' name='o2port' placeholder='input o2 port' value='"+port+"'><br>"; content += "input o2Server user:<input type='text' name='o2user' placeholder='input o2 user' value='"+O2_IOTServer.o2user+"'><br>"; content += "input o2Server user password:<input type='password' name='o2pass' value='"+O2_IOTServer.o2pass+"'><br>"; content += "<input type='submit' name='SUBMIT' value='Submit'></form><br>"; content += "<script>function check(){if (!document.all.pass.value || !document.all.o2host.value || !document.all.o2port.value || !document.all.o2user.value || !document.all.o2pass.value){alert('please input wifi password and o2 host,port,user,password '); return false; }; return true; }</script>"; content += "</body></html>"; _server->send(200, "text/html", content); } void O2IOTServer::_setConfig() { // for (int i = 0; i < 128; i++) { EEPROM.write(i, _ssidConfig[i]); delay(5); } EEPROM.commit(); //ESP8266需要使用EEPROM.commit()方法保存数据 } void O2IOTServer::getConfig() { for (int i = 0; i < 128; i++) { _ssidConfig[i] = EEPROM.read(i); } } void O2IOTServer::parseConfig() { if (strchr(_ssidConfig, '|')!=NULL){ if (_ssidConfig[0] != NULL) { O2_IOTServer.ssid_name = strtok(_ssidConfig, "|"); O2_IOTServer.ssid_pass = strtok(NULL, "|"); O2_IOTServer.o2user = strtok(NULL, "|"); O2_IOTServer.o2pass = strtok(NULL, "|"); O2_IOTServer.o2host = strtok(NULL, "|"); O2_IOTServer.o2port = strtok(NULL, "|"); } } } O2IOTServer O2_IOTServer;
现在我们完成了O2IOTServer类,实现了启动AP接入点,监听Web服务,并可以设置设备初始化信息了。
在主程序中调用
我们回到o2iot.ino文件,更新一下代码,调用O2IOTServer类。
//引用Arduino核心库 //引用O2IOTServer类 void setup() { O2_IOTServer.begin(); //启动AP接入点,并启动Web服务 } void loop() { O2_IOTServer.listening(); //监听http请求 }
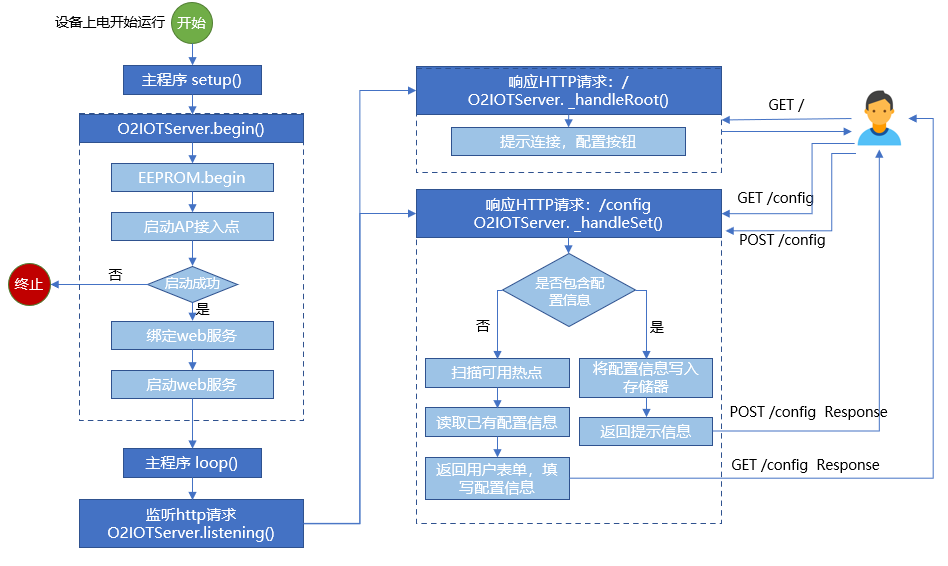
整个程序的逻辑过程基本上是如下图的样子:
验证和上载程序
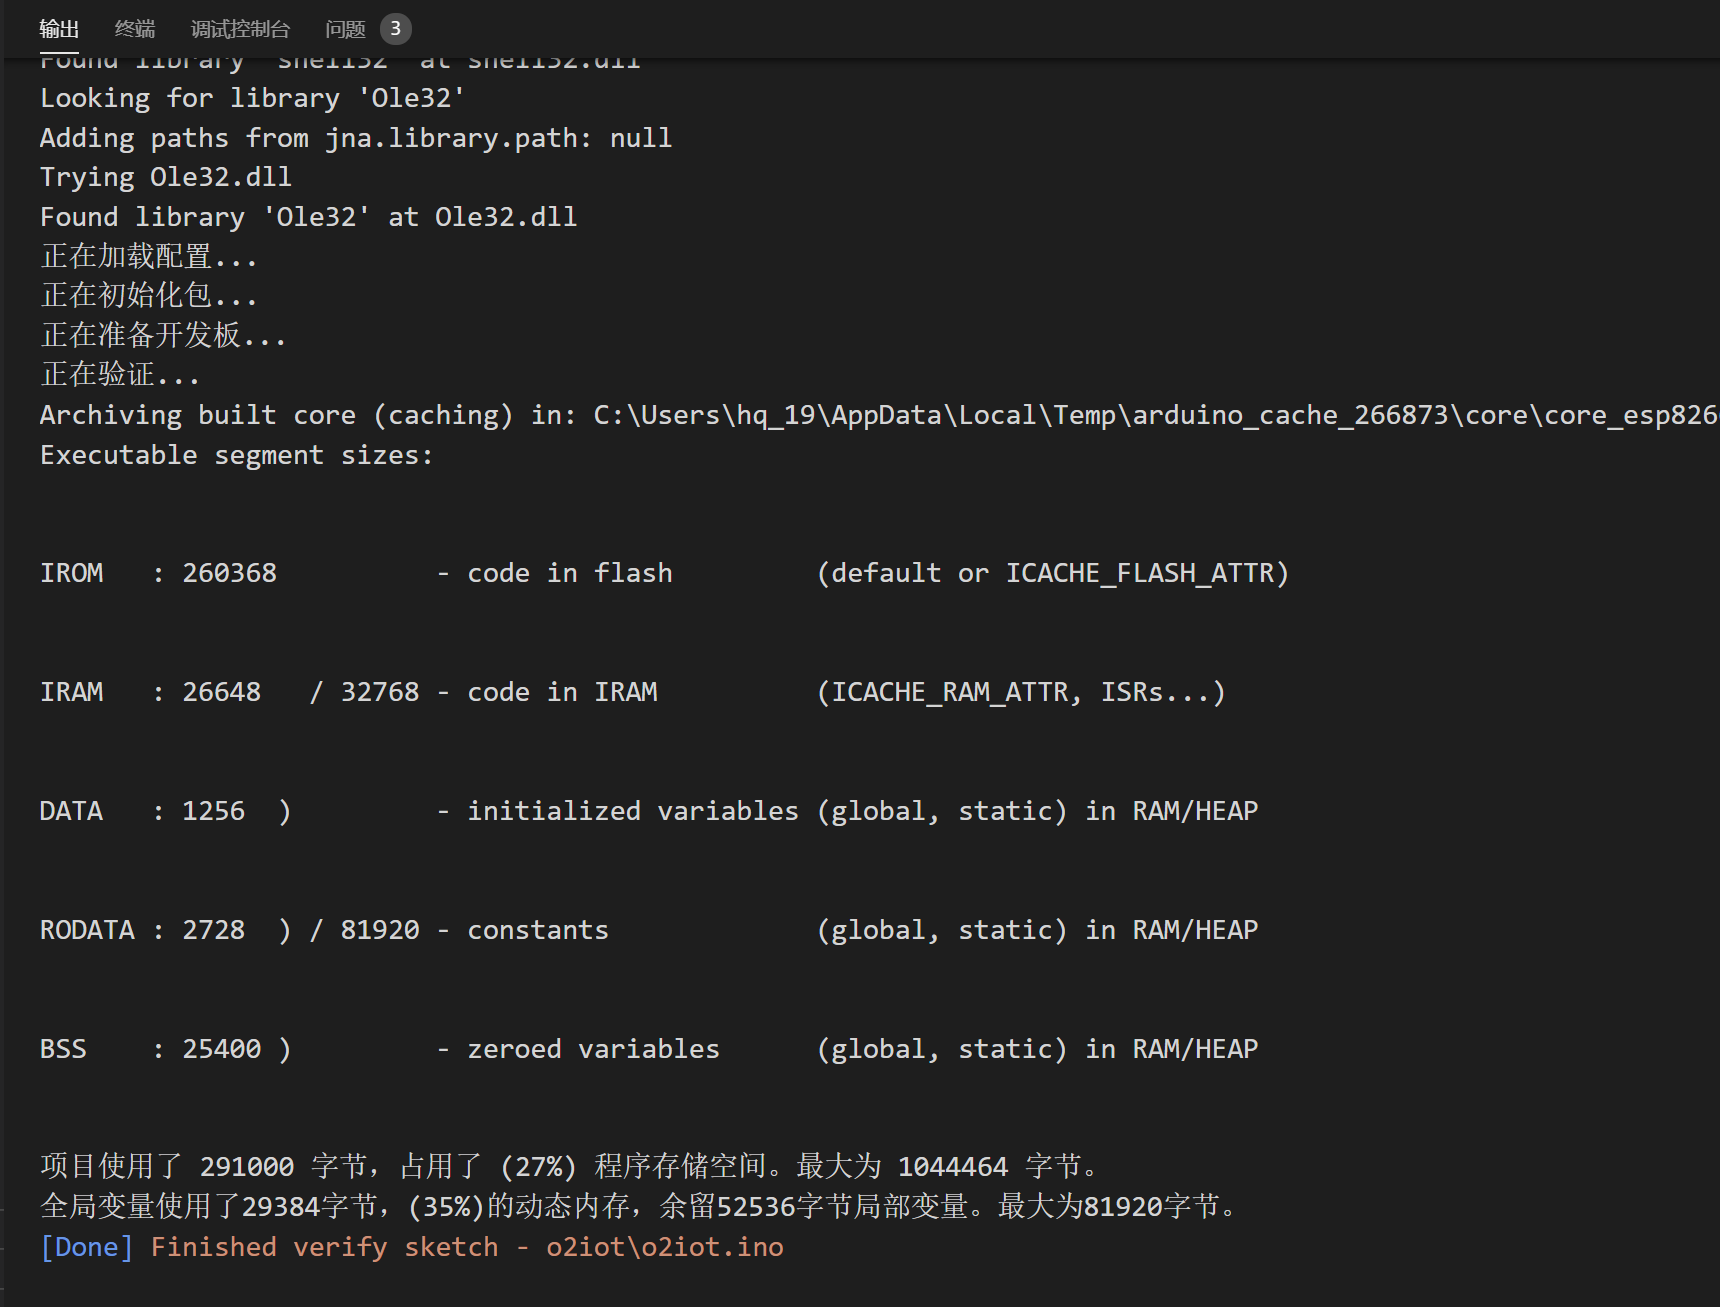
然后我们验证一下程序,点击右上角的验证按钮,或使用快捷键“Ctrl+Alt+R”,等待片刻后,在输出端,应该可以看到以下信息:
然后我们通过usb连接开发板,正确选择开发板类型和COM端口后,可以上载我们的程序,点击右上角的上载按钮,或使用快捷键“Ctrl+Alt_U”,等待片刻后,在输出端,应该可以看到以下信息:
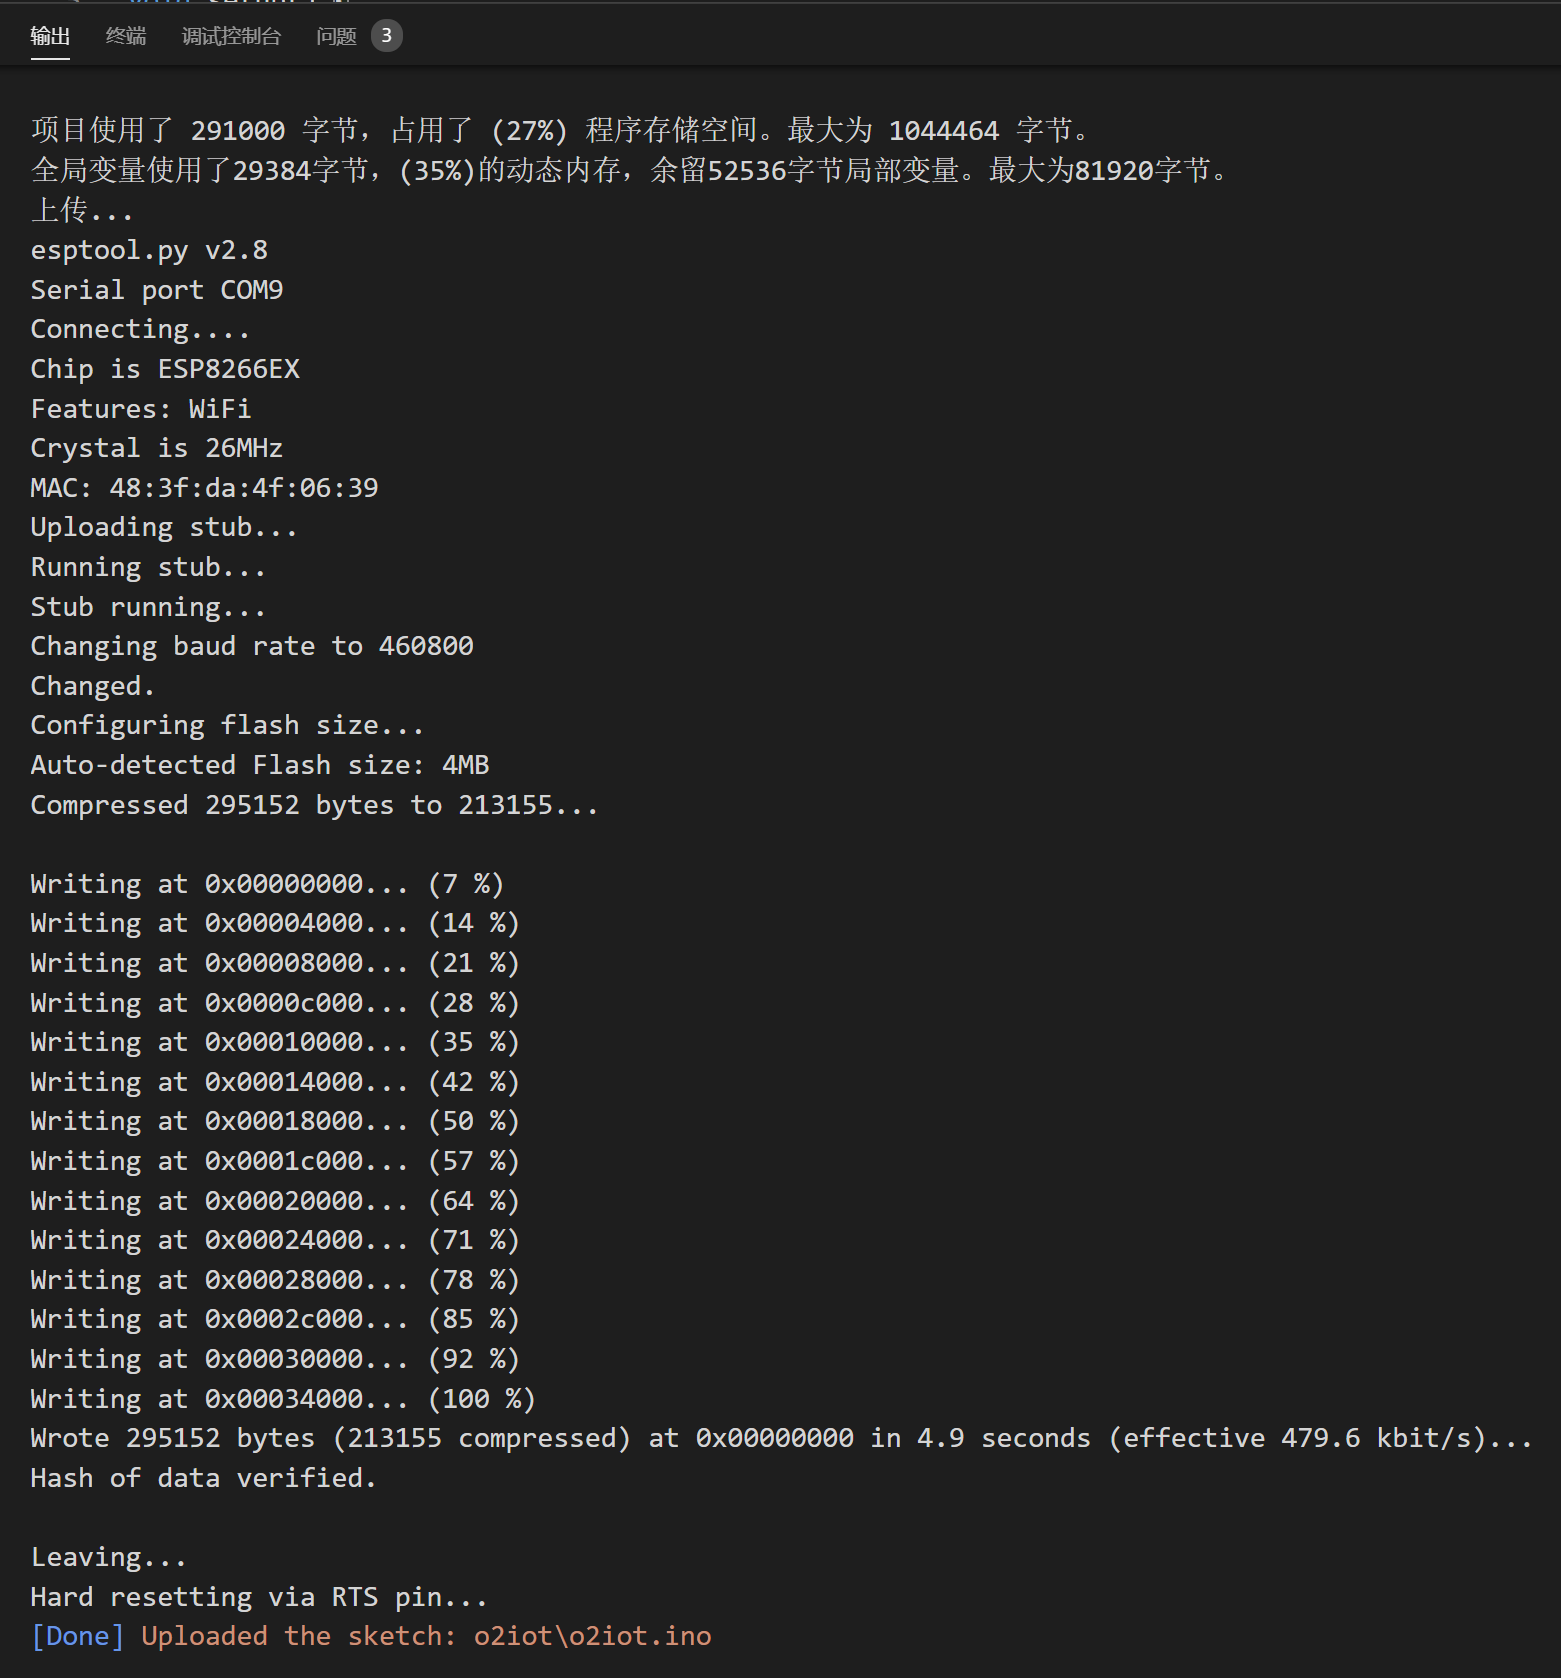
说明我们的程序上载成功了。
看看效果
此时,我们开发板上已经开始运行我们的程序了,我们可以通过其他具有wifi的终端浏览器,连接到o2iot这个热点,访问并设置我们的设备。
这里我通过手机连接到o2iot
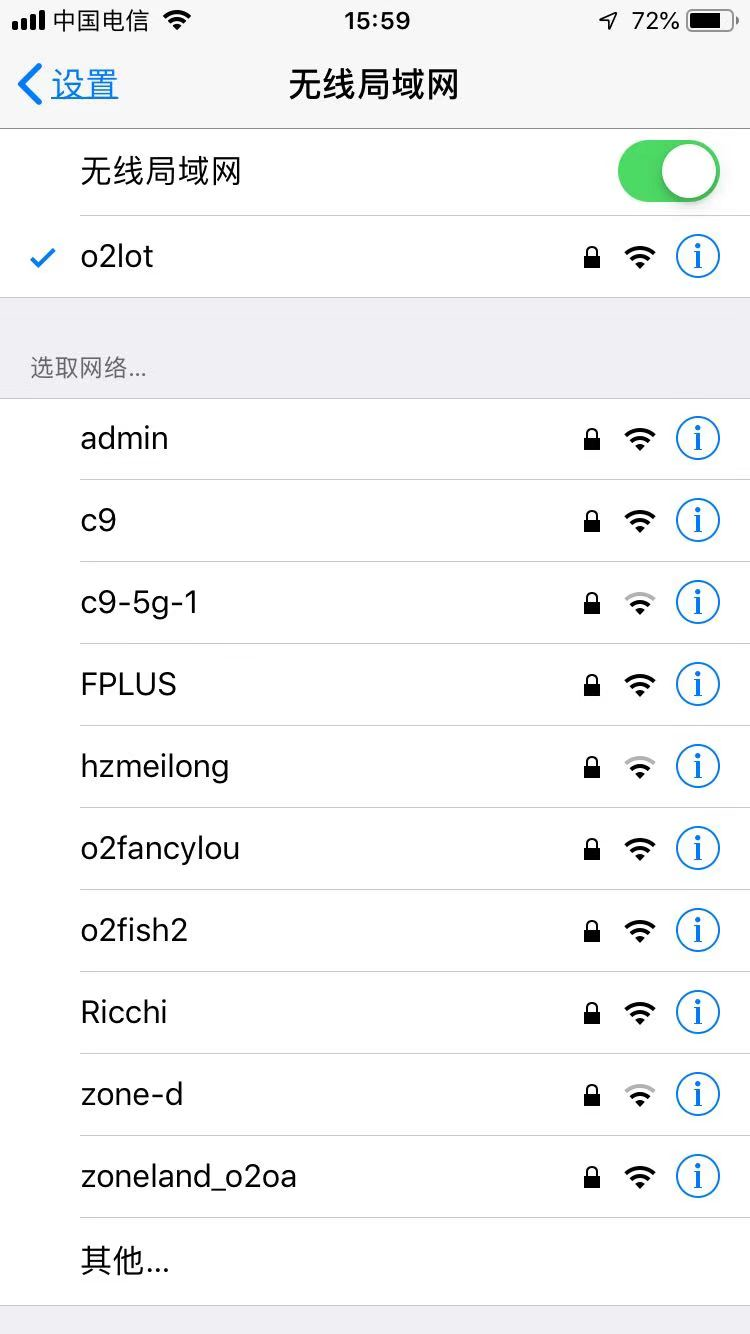
然后打开浏览器,输入“http://192.168.4.1”(esp8266默认IP地址为192.168.4.1)

点击“set your config”
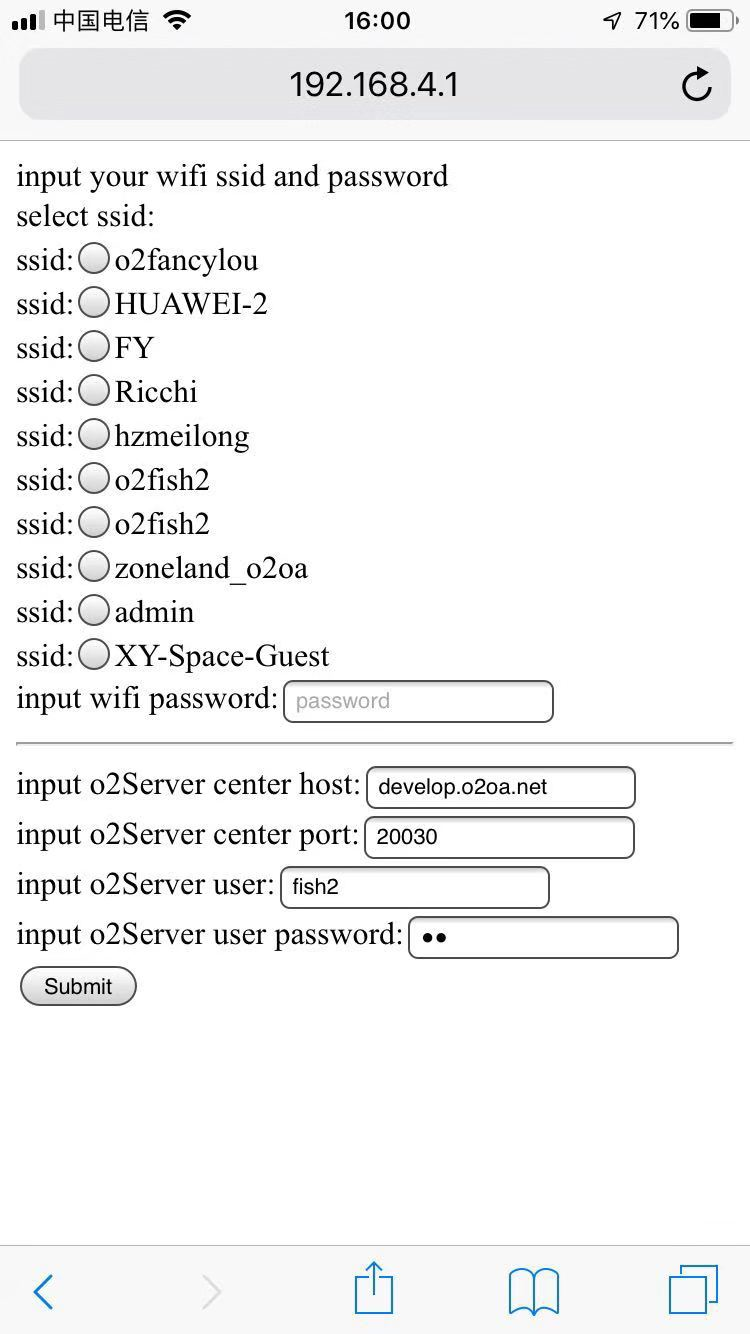
此处选择要连接的热点,输入相关的信息后,点“submit”

OK,我们设置的信息已经存储下来了,再次访问“http://192.168.4.1/config”,就可以看到我们上一次存储的配置信息。
下一章将介绍将设备作为客户端连接到wifi热点,并登录到O2OA服务器。


相关推荐
物联网智能家居平台DIY:ARDUINO 物联网云平台 手机 微信.rar
基于树莓派3b+Arduino实现物联网家庭环境监控系统源码(脸识别门禁+温湿度监测+灯光控制+语音播报+火灾报警)+项目说明.7z 带系统架构图 【硬件清单】 人脸识别部分: 树莓派3b tf卡16G以上 树莓派CSI摄像头500万像素...
本文将详细解析基于树莓派3B+与Arduino构建的家庭环境监控系统的源码实现,主要涉及物联网技术在软件和插件应用方面的知识点。 首先,我们要理解树莓派3B+和Arduino在物联网中的角色。树莓派是一款微型计算机,拥有...
Arduino 是一个开源的微控制器平台,广泛应用于物联网领域。物联网(Internet of Things,IoT)是指将各种物品通过互联网连接起来,实现智能化和自动化的概念。 Arduino 和物联网的结合,将改变我们未来的生活方式...
物联网智能家居平台DIY:Arduino+物联网云平台+手机+微信》给出了完整的物联网智能家居生态链的开发过程,用原理讲解配合实例演示的方式带领读者从最底层的传感器硬件、中间层的物联网云平台、应用硬件层的手机一直...
结合Arduino平台,它能够被广泛应用于各种项目中,特别是那些需要快速原型制作和功能丰富的场合。而阿里云物联网平台作为一个成熟的云服务提供者,它能够提供设备管理和数据存储等服务,极大地降低了物联网项目的...
若还需要嵌入式物联网单片机相关领域开发工具、学习资料等,我会提供帮助,提供资料,鼓励学习进步。 【本人专注嵌入式领域】: 有任何使用问题欢迎随时与我联系,我会及时解答,第一时间为你提供帮助,CSDN博客端...
在物联网(IoT)开发领域,Arduino 是一个非常流行的开源硬件平台,因其简单易用而深受开发者喜爱。本文将深入探讨标题中提到的几个关键库,它们是构建 Arduino IoT 应用的重要工具。 1. **HttpPacket**:这是一个...
智能开关平台,包含服务端、硬件端、安卓端和前端。硬件使用ESP8266模块,成本相对较低,可以发挥想象力,搭配各种传感器,实现自己的智能终端。 应用场景:智能开关的应用场景比较广泛,一般家里通电即可使用的设备...
首先,物联网机器人通过集成各种先进技术,例如四麦克纳姆轮(Mecanum wheel)作为移动基础,Arduino控制器和Arduino扩展板作为主要的计算和扩展平台,传感器列阵用于收集环境信息,WLAN无线通信技术实现远程信息...
这个库可以帮助你快速连接阿里云 IoT 平台,通过和阿里云物联网开发平台配合,可快速实现各种硬件应用,包括了很上层的封装,无需自己解析数据体,绑定事件即可,在 arduino d1 wifi平台实际测试成功。
本项目是基于Arduino的物联网入门工作坊,旨在为初学者提供一个实践物联网技术的平台。工作坊内容包括了物联网的基本概念、硬件设备的连接与编程、以及简单的物联网应用开发。 ## 项目的主要特性和功能 硬件连接...
本项目是一个基于Arduino的物联网教学设备代码库,主要用于展示物联网技术的实际应用。项目分为两个主要部分家庭自动化(HomeAuto)和早期预警系统(EarlyWarningSystem)。通过这些代码,用户可以学习如何使用...
# 基于Arduino的物联网学习实践平台 ## 项目简介 本项目是物联网(IoT)应用的实践项目,将现代智能设备与IoT技术集成,提供综合性学习体验。用户通过学习代码和实例,能深入理解物联网原理、应用与实现方式。项目...
本项目是一个基于Arduino平台的物联网设备测试系统,旨在通过一系列测试程序验证和展示Arduino在物联网应用中的各种功能。项目涵盖了时间管理、数据传输、串行通信、Web服务器以及PS2接口设备等多个方面的测试。 ##...
【标题】"基于arduino的物联网蔬菜大棚检测控制系统"是一个创新的智能农业项目,它利用了arduino微控制器平台和物联网技术,实现对蔬菜大棚环境的实时监测与自动化控制。这个系统旨在提升农业生产效率,确保蔬菜生长...
# 基于Arduino的物联网项目(wemos系列) ## 项目简介 这是一个基于Arduino开发板的物联网项目集合,面向有Arduino基础知识的学员。项目通过简单示例,展示短时间内实现物联网功能与应用的方法。 ## 项目的主要...
本项目是一个基于Arduino和物联网平台的智能家居系统,旨在通过Arduino设备连接传感器和执行器,实现智能家居设备的远程控制和管理。项目使用了MQTT协议进行通信,并集成了OTA(OverTheAir)更新功能,允许远程更新...
"Arduino物联网三步曲—(2)OneNET远程数据监控" 这个描述暗示了一个系列教程,其中第二部分涉及使用TimerOne库与OneNET平台进行远程数据监控。OneNET是中国移动推出的一个物联网平台,它允许开发者轻松地连接和...