This is part six of eight tutorials that walk through how to build a simple Digg client application using the Beta1 release of Silverlight 2. These tutorials are intended to be read in-order, and help explain some of the core programming concepts of Silverlight. Bookmark my Silverlight 2 Reference page for more of Silverlight posts and content.
<Download Code> Click here to download a completed version of this Digg client sample. </Download Code>
Understanding User Controls
A fundamental design goal of Silverlight and WPF is to enable developers to be able to easily encapsulate UI functionality into re-usable controls. Developers can implement new custom controls by deriving a class from one of the existing Control classes (either a Control base class or from a control like TextBox, Button, etc). Alternatively they can create re-usable User Controls - which make it easy to use a XAML markup file to compose a control's UI, and which are easy to implement.
For our Digg application, we want to implement a master/details scenario where the application allows an end-user to search on a topic, populate a list of stories related to that topic, and then enable them to select a story to bring up details about it. For example, selecting the below story in the list:

would bring up this detailed view about the story:

We are going to implement this details view by building a "StoryDetailsView" UserControl that we'll display when a story is selected from our ListBox.
Creating a StoryDetailsView User Control
We'll start by right-clicking on our DiggSample project node in Visual Studio and by selecting "Add New Item". This will bring up a new item dialog. We'll select the UserControl item template and name the new control we want to build "StoryDetailsView":
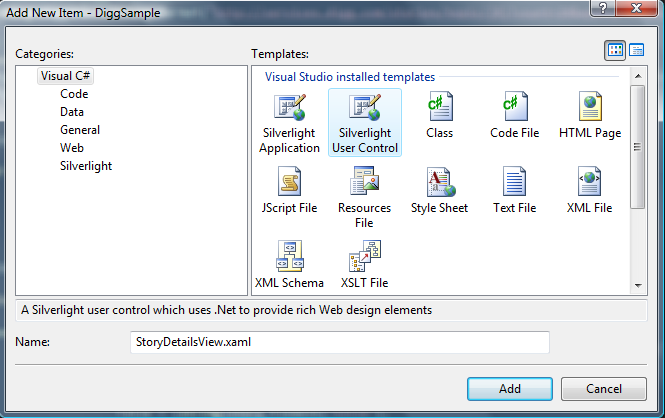
This will add a new UserControl with this name to our DiggSample project:
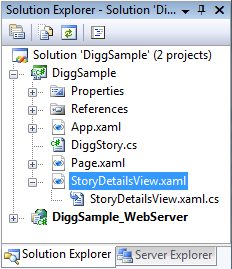
Building a Basic Modal Dialog Using a User Control
We are going to use our StoryDetailsView control to effectively display a dialog containing story details. When our story details user control displays we are going to want to have it appear on top of the other content on the page, and ensure that an end-user can't do other things with the page until they close the details view.
There are a couple of different ways we could implement this modal dialog-like behavior. For this particular scenario we are going to start by opening up the StoryDetailsView.xaml user control and adding the below XAML content to it:
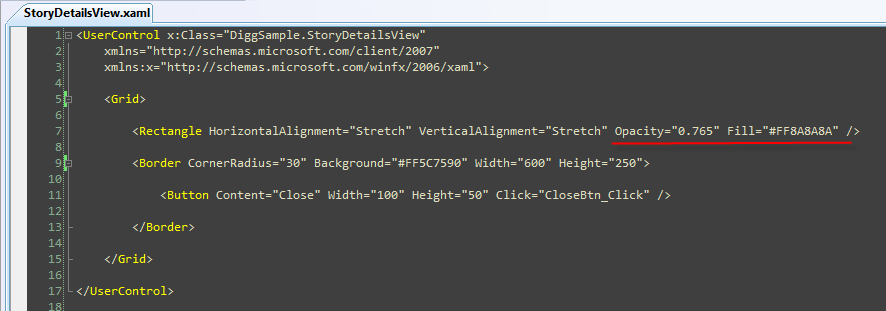
The first <Rectangle> control above is configured to stretch to take up all of the available space on the screen. Its background fill color is a somewhat transparent gray (because its Opactity is .765 you can see a little of what is behind it). The second <Border> control will then be layered on top of this Rectangle control, and take up a fixed width on the screen. It has a blue background color, and contains a Close button.
When visible, our StoryDetailsView user control will currently display a UI like below:
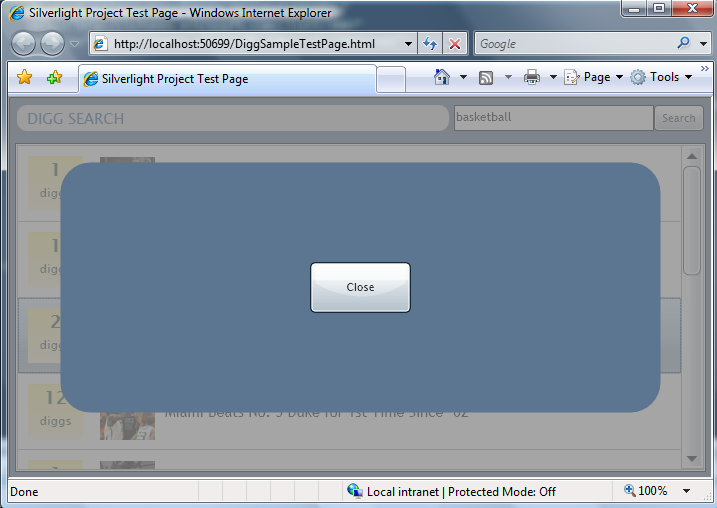
We can implement the "CloseBtn_Click" event handler method in the code-behind file of the user control. When pressed, the close button event handler will set the Visibility of the UserControl to "Collapsed" - which will cause it to disappear from the screen and return the user to the content below it:
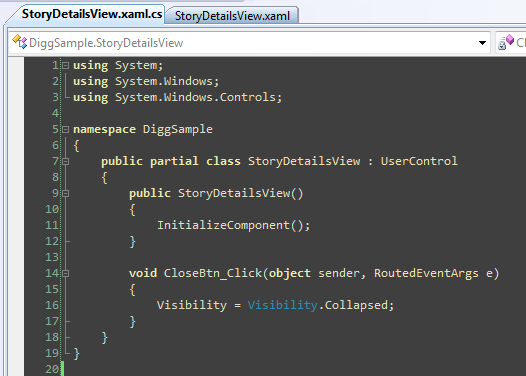
Displaying our StoryDetailsView Control
An easy way to cause our StoryDetailsView user control to appear on the screen would be to simply add it to the bottom of our Page.xaml file, and set its default visibility to Collapsed (which means it is not visible when the application first loads):

We can then handle the "SelectionChanged" event from our ListBox control within the Page.xaml's code-behind class:
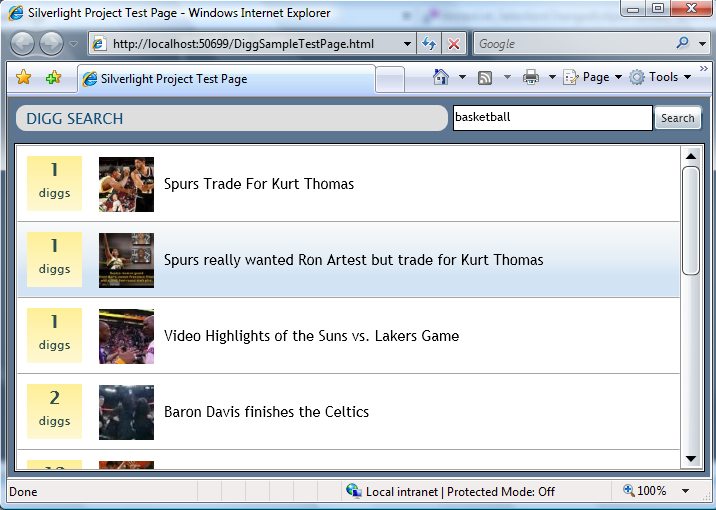
When a user selects a particular story in the list, we can use the ListBox SelectionChanged event handler to set the Visibility property of our ShowDetailsView user control to "Visible" :

This will cause our modal user control dialog to appear. When the user clicks its "Close" button, it will disappear, and the user will be free to select another story and repeat the process.
Passing Story Data to our StoryDetailsView User Control
Ultimately we want our StoryDetailsView UserControl to display detailed information about the story that the end-user selected from the stories ListBox.
Within our ListBox's "SelectionChanged" event handler (which is inside our page's code-behind class), we can gain access to the DiggStory data object that corresponds to the selected ListBox row by accessing the ListBox's "SelectedItem" property.
One approach we could use to pass this DiggStory object to our StoryDetailsView UserControl would be to simply set the "DataContext" property on the User Control to the selected DiggStory data object immediately before making the user control visible:

We could then write code within our UserControl to procedurally use the DataContext to display results. Or alternatively we could use databinding expressions to bind against its values.
For example, we could update our StoryDetailsView XAML to display the Title of the selected story using a databinding expression like below:
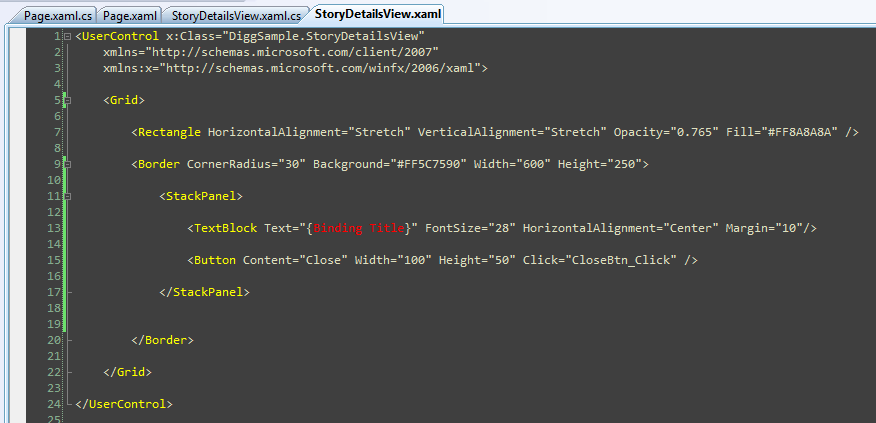
And now when a user clicks a story in the list:
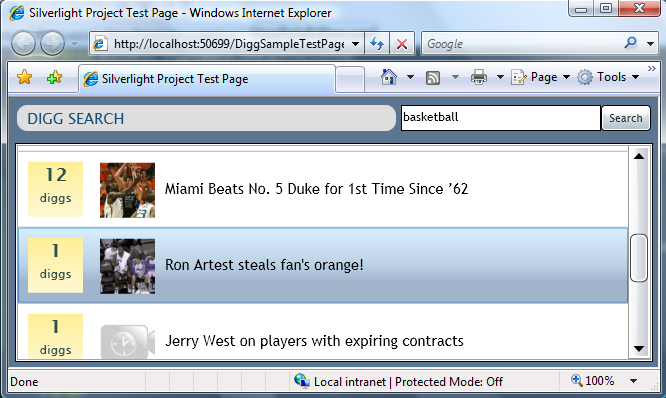
Our ListBox event handler will handle the selection, set the DataContext of the UserControl to the selected DiggStory object, and then make the user control visible:
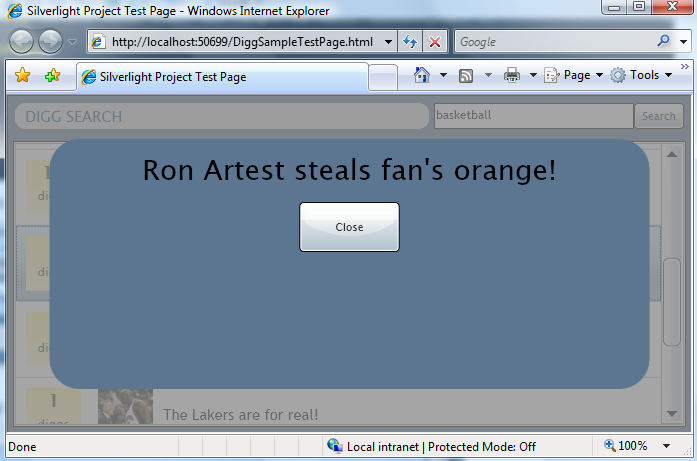
Notice how the DiggStory title now appears in the user control because of the databinding expression we added to it.
Finishing our User Control Layout
Our sample above demonstrates the basics of how we can put together a simple master/details dialog workflow. We can complete the StoryDetailsView display by adding more controls and databinding expressions to the User Control.
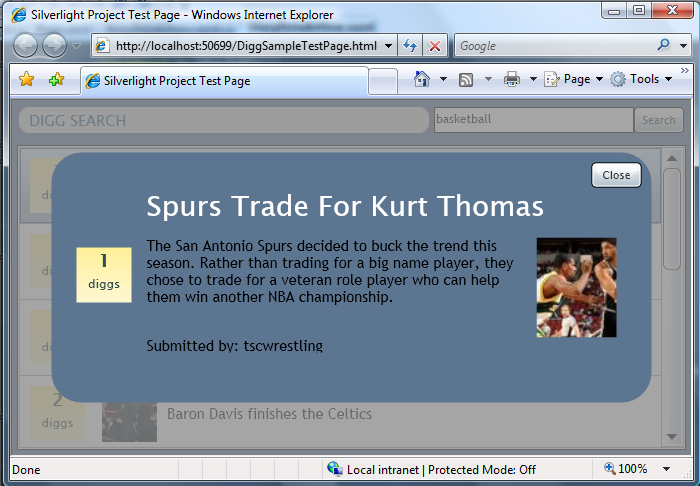
We could update the StoryDetailsView user control to look like above by updating its <Border> control to have the following inner content:
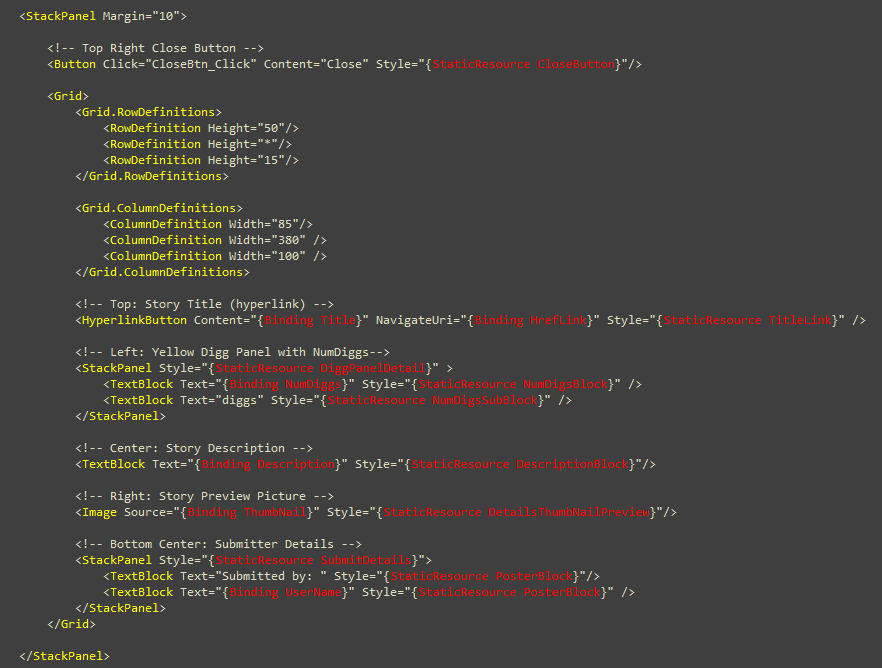
No code changes are required after this. Because we are using databinding to "pull" the values from the DataContext, we don't need to write any additional code.
Next Steps
We now have all of the core functionality and interaction workflow implemented for our Digg application.
The last step we are going to take is to tweak the UI of the application a little more. Specifically we want to add a slightly more polished and customized look to the ListBox and Button controls.
To-do that let's go to our next tutorial: Using Control Templates to Customize a Control's Look and Feel.


相关推荐
6. **Blend教程(Blend_Tutorial_05_CS.pdf)**:Microsoft Blend是Silverlight的可视化设计工具,教程中可能涵盖了如何使用Blend进行图形设计、动画制作以及与Visual Studio的集成,加速UI的开发过程。 7. **用户...
C#开发WPF/Silverlight动画及游戏系列教程(Game Tutorial) 的源代码 第一部分源码:WPFGameTutorial_PartI.rar(1-20节) 第二部分源码:WPFGameTutorial_PartII.rar (21-26节) 第三部分源码:WPFGameTutorial_Part...
有关DSP学习的英语教程,共为四部分。
C#开发WPF/Silverlight动画及游戏系列教程(Game Tutorial)目录 本系列教程目录如下: C#开发WPF/Silverlight动画及游戏系列教程(Game Tutorial):(一)让物体动起来① C#开发WPF/Silverlight动画及游戏系列教程...
C#开发WPF/Silverlight动画及游戏系列教程(Game Tutorial) 的源代码 第一部分源码:WPFGameTutorial_PartI.rar(1-20节) 第二部分源码:WPFGameTutorial_PartII.rar (21-26节) 第三部分源码:WPFGameTutorial_Part...
有关DSP学习的英语教程,共为四部分。
有关DSP学习的英语教程,共为四部分。
有关DSP学习的英语教程,共为四部分。
ANSYS FLUENT14.0 Tutorial Guide 自带算例 part3
ANSYS FLUENT14.0 Tutorial Guide自带算例文件 part2
C#开发WPF/Silverlight动画及游戏系列教程(Game Tutorial) 的源代码 第一部分源码:WPFGameTutorial_PartI.rar(1-20节) 第二部分源码:WPFGameTutorial_PartII.rar (21-26节) 第三部分源码:WPFGameTutorial_Part...
反汇编入门教程,绝对精品,共四十集,分七个压缩卷。 工具软件:OllyDBG A reversing tutorial for newbies by lena151
反汇编入门教程,绝对精品,共四十集,分七个压缩卷。 工具软件:OllyDBG A reversing tutorial for newbies by lena151
反汇编入门教程,绝对精品,共四十集,分七个压缩卷。 工具软件:OllyDBG A reversing tutorial for newbies by lena151
反汇编入门教程,绝对精品,共四十集,分七个压缩卷。 工具软件:OllyDBG A reversing tutorial for newbies by lena151
反汇编入门教程,绝对精品,共四十集,分七个压缩卷。 工具软件:OllyDBG A reversing tutorial for newbies by lena151
反汇编入门教程,绝对精品,共四十集,分七个压缩卷。 工具软件:OllyDBG A reversing tutorial for newbies by lena151
反汇编入门教程,绝对精品,共四十集,分七个压缩卷。 工具软件:OllyDBG A reversing tutorial for newbies by lena151
OpenGL ES Tutorial for Android – Part I – Setting up the view OpenGL ES Tutorial for Android – Part II – Building a polygon OpenGL ES Tutorial for Android – Part III – Transformations OpenGL ES ...
C#开发WPF/Silverlight动画及游戏系列教程(Game Tutorial) 的源代码 第一部分源码:WPFGameTutorial_PartI.rar(1-20节) 第二部分源码:WPFGameTutorial_PartII.rar (21-26节) 第三部分源码:WPFGameTutorial_Part...