前言
这是我第一次翻译技术性的文章,若有不正之处,请同行们多加指正。我个人认为翻译没有必要逐字逐句的进行,我的原则是:根据自己在实战方面的理解,尽可能的把原理讲清楚而又不失去原作的本意,同时加入自己的见解。
在自己的应用程序中使用RCP,能让我们重用Eclipse IDE的基本功能。部分1和部分2通过一个非常简单的,只打开一个空窗口的例子向你介绍了这个平台。部分3将向你介绍一个更加复杂点的,带有菜单、视图和其它特性的例子。
介绍
前两部分通过一个简单的应用阐述了RCP(Rich Client Platform)的基本概念。我们使用了Eclipse SDK提供的一个叫“Hello RCP”的插件项目模板。现在我们将深入探讨一个复杂的应用。我们能向应用程序中一次添加一样东西,但实际上这不是最好的办法。
当你自己写应用程序时,最快的办法是找一个模板或其它和你要创建的应用相类似的程序,然后拷贝。这也是我要使用的办法,使用一个叫“RCP Mail”的模板。在该教程的结尾有你需要理解掌握的信息,包含了该例子是如何工作的,然后你就可以基于此创建你自己的应用了。
RCP Mail template
这个RCP Mail 模板不是一个真正功能性的mail应用程序,但却是一个独立的RCP例子,教我们如何:
- 通过actions添加顶层菜单和工具栏
- 通过actions添加键盘绑定(keybindings )
- 创建不可关闭的视图和多个相同实例的视图
- 用placeholders为新的视图创建透视图
- 使用默认的About对话框
- 创建一个产品定义(product definition)
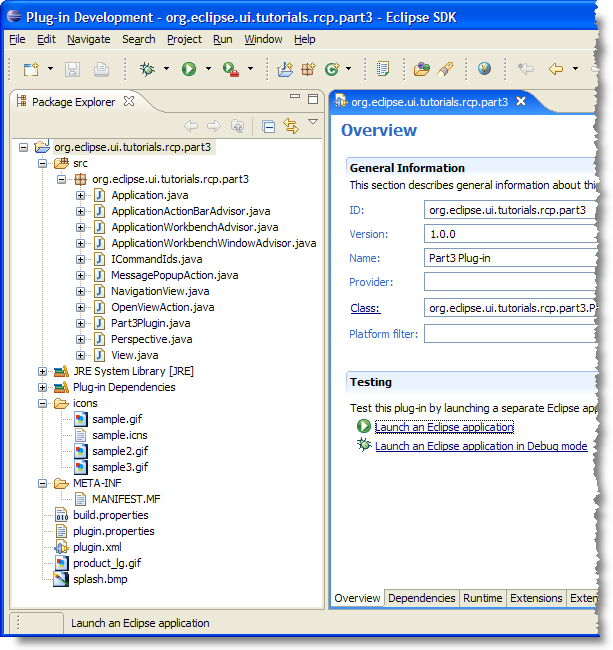
想第一部分一样,选择 File > New > Project, 展开Plug-in Development 然后再选择 Plug-in Project 打开一个插件项目创建向导.输入项目的名字,如 org.eclipse.ui.tutorials.rcp.part3,
在选择"Would you like to create a rich client application?"时选择 Yes. 然后点击下一步,选择RCP Mail Template后点击Finish


Figure 1. 通过RCP Mail Template生成的实例可以作为你自己RCP应用的骨架使用。
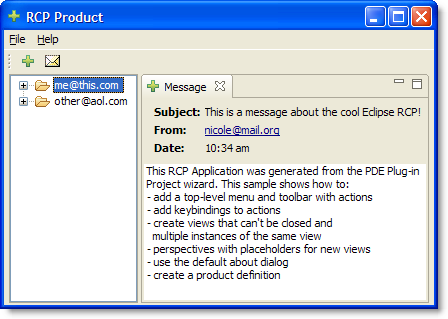
在Plug-in Manifest属性页中点击"Launch an Eclipse application"测试该应用,如果成功就会看到下面的图:

Views
RCP Mail 有两个视图,左边展示的是mail消息,右边是特定的mail消息。这些views都是通过org.eclipse.ui.views扩展点扩展而来,是在plugin.xml 中定义。 Listing 1 展示了 Message view的定义:
Listing 1. Message view defined in plugin.xml
         point="org.eclipse.ui.views">

            name="Message"
            allowMultiple="true"
            icon="icons/sample2.gif"
            class="org.eclipse.ui.tutorials.rcp.part3.View"
            id="org.eclipse.ui.tutorials.rcp.part3.view">
视图的标题栏使用的是一个文件名为sample2.gif 的16x16 icon的GIF图片。属性的说明如下:
id:仅仅是该视图的一个唯一标识符
class:详细指定了给视图的全称(包含包路径的view类)
allowMultiple:值为true表示一个特定的类型允许有多个视图,Eclipse默认只有一个
视图类 View 继承了抽象类 org.eclipse.ui.part.ViewPart. Listing 2中显示了部分代码. 只需要实现createPartControl() 和 setFocus() 方法。
Listing 2. View.java
public class View extends ViewPart {
 public static final String ID = "org.eclipse.ui.tutorials.rcp.part3.view";
 public void createPartControl(Composite parent) {
Composite top = new Composite(parent, SWT.NONE);
...etc...
}
public void setFocus() {
}
}
Notes:
 |
定义了一个ID常量,ID_模式在Eclipse源代码中随处可见。这里使用的ID和plug-in manifest中的id是一样的,当我们需要获得该视图时需要用到该ID。 |
 |
createPartControl 方法是该类中最重要的方法. 在这里需要创建视图中需要的 JFace 或 SWT 控件. 关于View编程不在该教程讨论之列,但在引用部分有一些资源可供你学习。 |
你也许会奇怪,Eclipse是如何知道把Mailbox视图放在左边,而把Messages放在右边?这就需要用到透视图Perspective了。
透视图Perspectives
Views 和editors只能显示在 perspective中., 可以在plugin.xml中通过扩展 org.eclipse.ui.perspectives 来定义透视图. The initial layout for it (i.e., what parts it starts up with) is set up in code. Listing 3 展示了RCP Mail application中的初始化布局代码 。
Listing 3. Perspective.java
java 代码
注意:
 |
因为该例子没有使用到编辑器,所以在你关闭编辑器后在工作台窗口的中间不会看到一大片空白。如果你使用了编辑器,则删除该行。 |
 |
该 行在透视图中添加Navigation视图,默认是可见的。 这是一个独立的视图,意味着它不能和其它视图相互折叠,同时没有标题栏。代表位置的参数指定了视图显示在编辑器区域的左边,占据工作台窗口水平区域的 1/4。你也许很奇怪,因为我们没有使用编辑器区域,但它好像隐藏在某处,即使它是不可见的。 |
 |
还记得我们什么时候创建的Messages视图吗,它使用的 allowMultiple="true"吗? 这意味着你不能确定Messages视图的位置,因为它们不只一个。所以首先你需要为它们创建一个folder,然后调用addPlaceholder() 方法把folder与和Message 视图标识id相匹配的pattern 联系起来. 最后调用 addView() 添加视图. 在一个真实的应用中你也许要记住哪个message先被打开,以便在程序重启后重新打开。 |
 |
设置Navigation视图不能关闭 |
 为了在下次启动应用时恢复用户的布局和窗口的大小,需要在
WorkbenchAdvisor中添加configurer.setSaveAndRestore(true); 到initialize()方法中。
Unclosable 和unmoveable views
默认的视图是可以拖动、改变大小和可关闭的。但有时你不想那么的灵活,例如,你正在为用户开发一个订单应用程序,你不想回答那些意外关闭表单页面的请求,这时该如何做呢?基于次原因Eclipse平台提出了确定的透视图和不可关闭/不可拖动视图的概念。
RCP Mail 例子通过使用setCloseable()方法来设置导航器Navigation为不可关闭。但更好的方法是使用一个固定的透视图。一个固定的透视图可以使它所包含的所以视图不可关闭,阻止它们被拖动或被改变大小。为了固定透视图,你可以在createInitialLayout()内部调用通过layout的setFixed(true)方法,或者直接在plugin.xml文件中添加fixed="true"属性。
通过使用固定的透视图,你能将用户锁定在一个透视图中,同时把所有有关透视图的概念一起隐藏。
Menus 和 Toolbars
让人们配置所以的菜单和工具条是只是其中一项,是RCP平台最基本的部分。有两种方式在RCP应用中添加菜单和工具条:
- 扩展
ActionBarAdvisor 类
- 在plug-in manifest中使用
org.eclipse.ui.actionSets extension
扩展ActionBarAdvisor 是引用内置Workbench actions的唯一办法, 所以该例使用了这一方式。如果你想在一个独立的RCP应用中和Eclipse IDE的插件中用相同的代码,最有效的方式还是进可能多的用 org.eclipse.ui.actionSets 。
 Actions, commands, menus, and toolbars 在Eclipse 3.2 或 3.3 中可能被重构了,所以该文很有可能会改变。
Listing 4. ApplicationActionBarAdvisor.java
java 代码
注意:
 |
makeActions() 是由平台来调用的,用来创建所有与菜单和工具栏想关联的 actions 。一个Action是一个拥有用户接口组件(菜单和工具栏如何显示)和功能组件(动作)的简单类。可以通过查看Javadoc 的 ActionFactory 和ContributionItemFactory来了解被支持的 Workbench actions列表。 |
 |
fillMenuBar() 是用actions来填充工作台的菜单栏. RCP Mail 包含了两个顶层菜单, "File" 和 "Help". 首先你要为每个顶层菜单创建一个 MenuManager,然后将菜单添加到菜单栏,将actions添加到菜单。 |
 |
fillCoolBar() 定义了Workbench的coolbar . 一个 coolbar 是 toolbars的集合, 而一个 toolbar 又是actions的集合. 在这个实例中只有一个 toolbar. 你先创建一个新的toolbar manager , 然后添加 toolbar 到 coolbar, 最好添加actions 到toolbar. |
 创建一些placeholders来容纳那些通过插件添加进来的附加菜单项是一个好办法. 在开始编码时,你应该使用那些标准的placeholder命名。通过使用预定义的groups,你可以像用插件plug-ins把菜单和工具栏项添加到 Eclipse IDE一样把它们添加进你的 RCP应用中.除了在Javadoc的
IWorkbenchActionConstants以外没有其它任何的资料文档,即使在Javadoc中也没有任何指南。最好的参考就是Eclipse IDE 源代码本身。
Making it a product
RCP Mail 模板已经使用 org.eclipse.core.runtime.products扩展定义了一个product. 然而它不是一个 .products 文件,所以你必须创建一个包含扩展名的用户产品定义。选择 New > Product Configuration. 在列表中选择已存在的 product ID (org.eclipse.ui.tutorials.rcp.part3.product) 和已存在的application (org.eclipse.ui.tutorials.rcp.part3.application) . 然后输入产品名称 RCP Tutorial 3. 最好切换到配置标签页,添加插件。
![]()
Branding
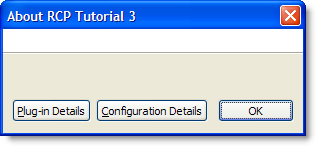
RCP应用运行时,选择 Help > About RCP Tutorial 3. 你将会看到 Figure 3.

Figure 3. 标准的 About
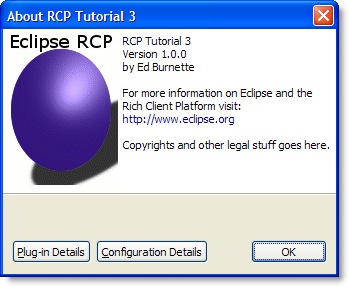
下面让我们看看 RCP's branding标签项. 退出应用,切换到Product Configuration 编辑器的Branding标签项. 找到About对话框.然后 在Image项点击Browse按钮,在插件项目中选择 product_lg.gif . 该文件由RCP Mail template提供, 但你可以很容易的提供你自己的. 点击 OK 继续.
现在选中Text 部分,然后输入你想About对话框的显示内容.例如产品的名字,版本,技术支持和其它的版权许可信息.完成后保存配置信息,返回到 Overview 标签页, 点击 Synchronize, 再次加载. 当程序启动时打开 About 文本框,你将看到和 Figure 4一样.

Figure 4. With a branding you can add those little touches that make the application your own.
 确保在你的插件构建配置中包含了images和icons文件(在Plug-in Manifest 中的Build 标签,或者
 build.properties 文件). 否则它们不会包含在插件的jar包中或在导出操作时不会拷贝它们。 模板中我们注意到了那些,但很容易在你自己的应用中忘记。
后记:花了一天的时间把这篇文章翻译完了,感觉上看得懂,但翻译起来有点拿不准,可能是我的英文太烂的原因吧。最近的项目需要用rcp技术来做,这是一篇入门的文章,以后我还会持续写一些自己的积累和体会。


