LayoutAnimationCotroller和AnimationListener监听器的使用
之前已经学过关于动画(Animation)的相关知识,动画总共分为两大类有:1.补间动画,2.逐帧动画
但单单使用这俩种动画效果,有时达不到自己想要的效果,比如显示一个列表,让它一条一条慢慢显示出每一个条目
关于LayoutAnimationController也是第一次学习,什么是LayoutAnimationController呢?
1.LayoutAnimationController用于为Layout中的控件,或者是ViewGroup中的控件设置动画效果。
2.每个控件都有相同的动画效果。
3.这些控件的动画效果在不同的实现显示出来。
4.LayoutAnimationController可以在xml中实现,也可以在代码中实现
下面是一个简单的实例:
点击按钮时,会慢慢显示列表,每一条条目从透明到不透明这种动画效果呈现
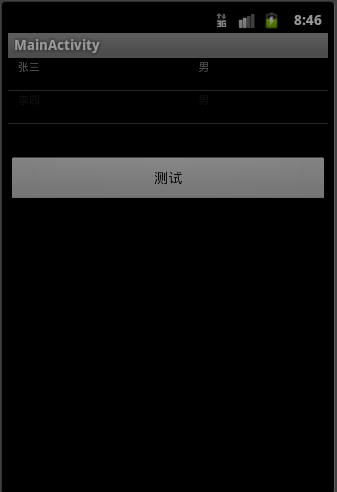
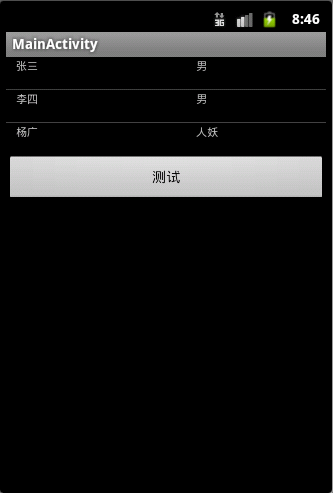
在xml当中使用LayoutAnimationController的方法
1.在anim目录下定义一个xml文件:list_layout_anim.xml,
说明:使用layoutAnimation标签
android:delay="2",设置延迟2秒中执行动画
android:animationOrder="normal",按普通顺序来执行动画,即从第一条开始执行,若设置为“random”,则是随机执行。
android:animation="@anim/list_anim",使用自定义的动画效果,在同一目录下
<?xml version="1.0" encoding="utf-8"?>
<layoutAnimation xmlns:android="http://schemas.android.com/apk/res/android"
	android:delay="2"
	android:animationOrder="normal"
	android:animation="@anim/list_anim" />
2.再定义一个xml文件:list_anim.xml,自定义的动画效果,透明度淡入的效果
<?xml version="1.0" encoding="utf-8"?>
<set xmlns:android="http://schemas.android.com/apk/res/android"
    android:interpolator="@android:anim/accelerate_interpolator"
    android:shareInterpolator="true">
    <alpha
        android:fromAlpha="0.0"
        android:toAlpha="1.0"
        android:duration="1000"
        />
</set>
3.在布局文件中相应控件中配置LayoutAnimationController
这里是在ListView中配置:
<LinearLayout xmlns:android="http://schemas.android.com/apk/res/android"
    xmlns:tools="http://schemas.android.com/tools"
    android:id="@+id/LinearLayout1"
    android:layout_width="match_parent"
    android:layout_height="match_parent"
    android:orientation="vertical" >
	<ListView
	    android:id="@id/android:list"
	    android:layout_width="match_parent"
	    android:layout_height="wrap_content"
	    android:scrollbars="vertical"
	    android:layoutAnimation="@anim/list_layout_anim"
	    />
	<Button
	    android:id="@+id/bn"
	    android:layout_width="match_parent"
	    android:layout_height="wrap_content"
	    android:text="测试"/>
</LinearLayout>
如果是在代码中使用LayoutAnimationController,则删除在布局文件下配置的
android:layoutAnimation="@anim/list_layout_anim"
在代码中的实现:
public class MainActivity extends ListActivity {

	private Button bn = null;
	private ListView listView = null;
    @Override
    public void onCreate(Bundle savedInstanceState) {
        super.onCreate(savedInstanceState);
        setContentView(R.layout.main);
        bn = (Button) findViewById(R.id.bn);
        listView = getListView();
        bn.setOnClickListener(new ButtonListener());
    }

    private ListAdapter BuildListAdapter(){
    	List<HashMap<String, String>> list= new ArrayList<HashMap<String,String>>();
    	HashMap<String, String> user1 = new HashMap<String, String>();
    	user1.put("user_name", "张三");
    	user1.put("user_gender", "男");

    	HashMap<String, String> user2 = new HashMap<String, String>();
    	user2.put("user_name", "李四");
    	user2.put("user_gender", "男");

    	HashMap<String, String> user3 = new HashMap<String, String>();
    	user3.put("user_name", "杨广");
    	user3.put("user_gender", "人妖");

    	list.add(user1);
    	list.add(user2);
    	list.add(user3);

    	SimpleAdapter simpleAdapter = new SimpleAdapter(this, list, R.layout.item, new String[]{"user_name", "user_gender"}
    	,new int[]{R.id.user_name, R.id.user_gender} );
		return simpleAdapter;
    }

    private class ButtonListener implements OnClickListener{

		@Override
		public void onClick(View v) {
			// TODO Auto-generated method stub
			listView.setAdapter(BuildListAdapter());

			Animation animation = AnimationUtils.loadAnimation(MainActivity.this, R.anim.list_anim);
			LayoutAnimationController lac = new LayoutAnimationController(animation);
			lac.setOrder(LayoutAnimationController.ORDER_NORMAL);
			lac.setDelay(0.5f);
			listView.setLayoutAnimation(lac);
		}

    }
}
ListView的布局文件:item.xml
<?xml version="1.0" encoding="utf-8"?>
<LinearLayout xmlns:android="http://schemas.android.com/apk/res/android"
    android:layout_width="match_parent"
    android:layout_height="match_parent"
    android:orientation="horizontal"
    android:paddingLeft="10dip"
    android:paddingRight="10dip"
    android:paddingTop="1dip"
    android:paddingBottom="1dip"
    >
    <TextView
        android:id="@+id/user_name"
        android:layout_width="180dip"
        android:layout_height="30dip"
        android:textSize="5pt"
        android:singleLine="true"
        />
    <TextView
        android:id="@+id/user_gender"
        android:layout_width="match_parent"
        android:layout_height="match_parent"
        android:textSize="5pt"
        android:singleLine="true"
        />

</LinearLayout>
总结而言就是如下:
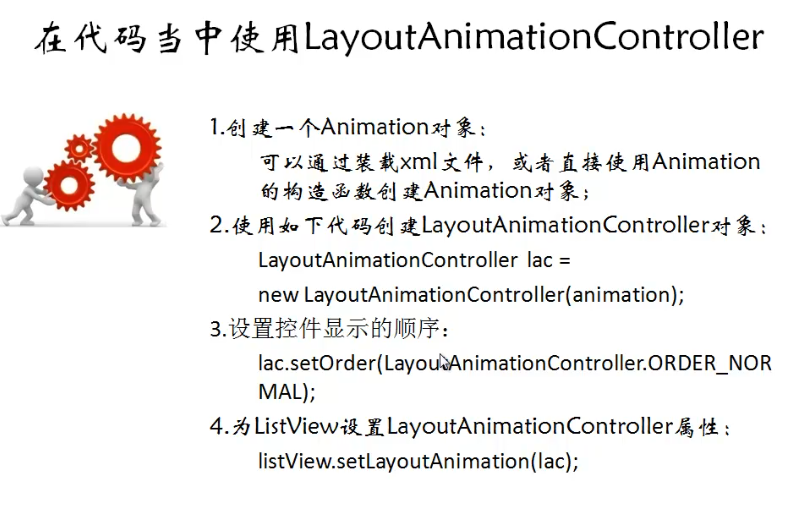
介绍完LayoutAnimationController,接下来是关于AnimationListener的使用
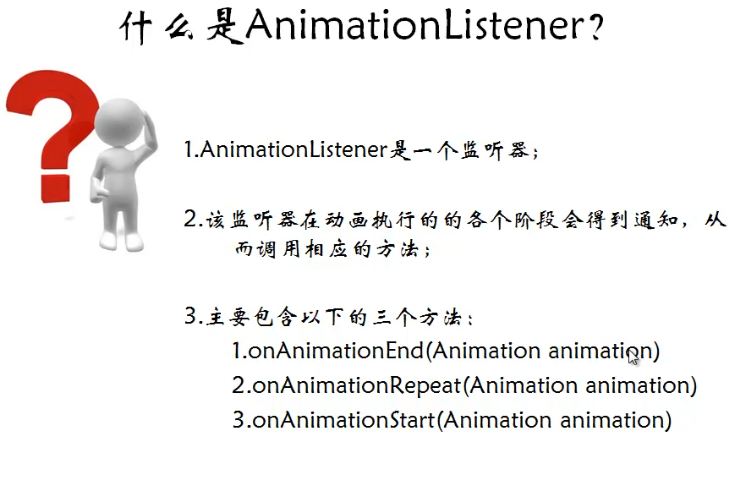
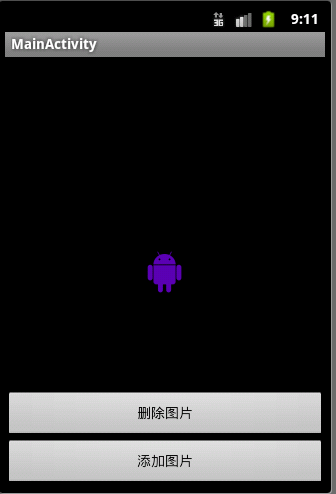
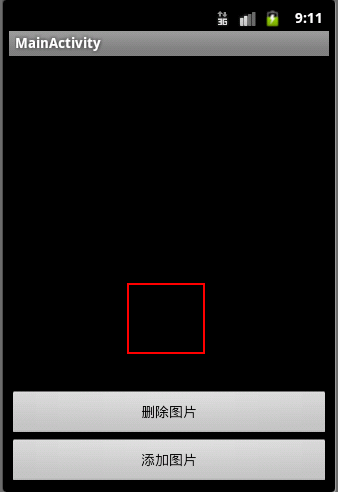
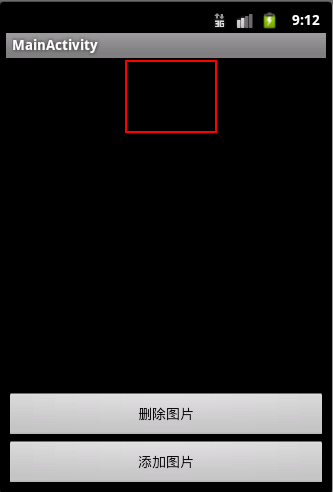
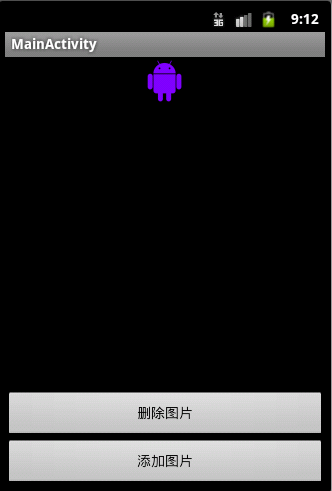
下面是一个实例:效果是,按删除按钮,图片会程淡出的效果消失,并在Activity中删除,删除就是在AnimationListener中的onAnimationEnd方法中实现,点击添加图片按钮,就会在界面中显示出图片,也是呈淡入的效果出现。
效果图:比较简单,只是为了明白整个过程
布局文件:
<RelativeLayout xmlns:android="http://schemas.android.com/apk/res/android"
    xmlns:tools="http://schemas.android.com/tools"
    android:layout_width="match_parent"
    android:layout_height="match_parent"
    android:id="@+id/layoutId"
    >
    <Button
        android:id="@+id/addImageButton"
        android:layout_width="match_parent"
        android:layout_height="wrap_content"
        android:layout_alignParentBottom="true"
        android:text="添加图片"
        />
    <Button
        android:id="@+id/removeImageButton"
        android:layout_width="match_parent"
        android:layout_height="wrap_content"
        android:layout_above="@id/addImageButton"
        android:text="删除图片"
        />
	<ImageView android:id="@+id/imageViewId"
		android:layout_width="wrap_content"
		android:layout_height="wrap_content"
		android:layout_centerInParent="true"
		android:layout_marginTop="100dip"
		android:src="@drawable/ic_launcher" />
</RelativeLayout>
public class MainActivity extends Activity {

	private Button addImageButton = null;
	private Button removeImageButton = null;
	private ImageView imageView = null;
	private ViewGroup viewGroup = null;
    @Override
    public void onCreate(Bundle savedInstanceState) {
        super.onCreate(savedInstanceState);
        setContentView(R.layout.main);
        addImageButton = (Button) findViewById(R.id.addImageButton);
        removeImageButton = (Button) findViewById(R.id.removeImageButton);
        imageView = (ImageView) findViewById(R.id.imageViewId);
        viewGroup = (ViewGroup) findViewById(R.id.layoutId);

        addImageButton.setOnClickListener(new OnClickListener() {

			@Override
			public void onClick(View v) {
				// TODO Auto-generated method stub
				//创建了一个淡入效果的Animation对象
				AlphaAnimation alphaAnimation = new  AlphaAnimation(0.0f, 1.0f);
				alphaAnimation.setDuration(1000);
				alphaAnimation.setStartOffset(100);
				//创建一个新的ImageView
				ImageView imageViewAdd = new ImageView(MainActivity.this);
				imageViewAdd.setImageResource(R.drawable.ic_launcher);
				//将新的ImageView添加到viewGroup当中
				viewGroup.addView(imageViewAdd, new LayoutParams(LayoutParams.FILL_PARENT, LayoutParams.WRAP_CONTENT));
				imageViewAdd.startAnimation(alphaAnimation);
			}
		});

        removeImageButton.setOnClickListener(new OnClickListener() {

			@Override
			public void onClick(View v) {
				// TODO Auto-generated method stub
				//创建一个淡出效果的Animation对象
				AlphaAnimation alphaAnimation = new AlphaAnimation(1.0f, 0.0f);
				alphaAnimation.setDuration(1000);
				alphaAnimation.setStartOffset(500);
				//为Animation设置监听器
				alphaAnimation.setAnimationListener(new RemoveAnimationListener());
				imageView.startAnimation(alphaAnimation);
			}
		});
    }

    private class RemoveAnimationListener implements AnimationListener{

		@Override
		public void onAnimationEnd(Animation animation) {
			// TODO Auto-generated method stub
			System.out.println("end");
			//从viewGroup当中删除掉imageView控件
			viewGroup.removeView(imageView);
		}

		@Override
		public void onAnimationRepeat(Animation animation) {
			// TODO Auto-generated method stub
			System.out.println("repeat");
		}

		@Override
		public void onAnimationStart(Animation animation) {
			// TODO Auto-generated method stub
			System.out.println("start");
		}

    }
}
分享到:


相关推荐
在Android开发中,时间选择器是一个非常常见的组件,用于让用户便捷地选取时间,例如小时、分钟,甚至日期。"Android-PickerView"是一个专门用于实现这种功能的库,它提供了多种样式和实现方式,包括弹窗式和XML布局...
4. **启动和结束刷新**:在监听器中处理滑动事件,当触发刷新条件时调用startRefresh(),刷新完成后调用onRefreshComplete()。 在实际开发中,开发者还可以结合AsyncTask或其他网络请求库,实现在用户触发刷新时...
总之,"Android-ObservableScrollView-master"是一个强大且实用的Android开发工具,它通过提供可观察的ScrollView和NestedScrollView,以及相关的监听器和工具类,极大地简化了滚动视图与界面组件交互的实现,特别是...
`android-gif-drawable`库正是为了解决这个问题而诞生的,它是一个强大的第三方库,提供高效、内存友好的GIF解析和渲染。 `android-gif-drawable`库由Sebastian Staudt开发,其核心目标是为Android平台提供高性能的...
在实际应用中,开发者可以通过以下步骤集成和使用android-times-square: 1. 添加依赖:在项目的build.gradle文件中添加库的依赖。 2. 初始化:在布局XML文件中添加`CalendarView`,或者在代码中创建并添加到视图...
在Android平台上,来电和去电的监听以及电话挂断的处理是通过系统级别的电话状态监听器(PhoneStateListener)实现的。这个功能涉及到Android的电信服务API,它允许应用程序接收和响应电话事件,如通话开始、结束、...
在Android中,我们可以使用`java.net.Socket`类进行Socket编程,包括创建Socket对象、连接服务器、发送数据和接收数据等步骤。然而,原生的Socket操作较为繁琐,涉及到异常处理、线程同步等多个层面,对于开发者来说...
Android-X5WebView基本封装和使用 通过OkHttp拦截器、自定义CookieJar有效完成客户端与H5端的Cookie同步管理 监听WebView的加载进度 滚动条的设置(隐藏或者显示,内侧显示还是外侧显示) 优化X5WebView的预加载问题...
此外,还可以设置监听器,实时获取 GIF 播放的状态,如当前帧数等,以便在用户交互时做出相应的反馈。 在集成 "android-gif-drawable" 到项目中时,有多种方式可以使用。你可以通过添加其依赖到 Gradle 构建文件来...
在`bachors-Android-Prefix-Input-94c23be`这个压缩包中,包含了`Android-Prefix-Input`项目的源码,开发者可以深入研究其内部实现,以便更好地理解和定制化使用。源码的学习有助于我们理解如何扩展Android的UI组件...
【Android 日期选择器 UI 开源】:android-times-square 是一个专门为 Android 平台设计的高级日期选择器库,它提供了丰富的功能和高度定制性,让开发者能够轻松地在应用程序中实现美观且易于使用的日期选择功能。...
`DialogBuilder` 提供了便捷的方法来添加这些监听器,比如 `setPositiveButton()` 和 `setNegativeButton()`。 6. **对话框动画**:为了增加用户体验,还可以自定义 Dialog 的显示和消失动画。通过设置 `Window` 的...
使用Android-Hauler库,开发者可以轻松地为自己的Activity添加滑动关闭功能,无需编写大量的自定义视图和触摸事件处理代码。该库提供了简单易用的API接口,可以方便地集成到现有的项目中。开发者只需在Activity中...
为了获取用户选择的文件或目录,需要设置监听器: ```java fileChooser.setOnFileSelectedListener(new FileChooser.OnFileSelectedListener() { @Override public void onFileSelected(String filePath) { //...
在Android应用开发中,UI控件的选择和使用是至关重要的,因为它们直接影响到用户体验。`Android PickerView`库就是这样一个工具,它为开发者提供了丰富的选择器功能,使得在处理时间选择、多级联动选择等场景时更加...
4. 在布局XML文件中,用UltraPullToRefreshLayout替换原有的ListView或RecyclerView等组件,并设置相应的刷新监听器。 框架的核心组件UltraPullToRefreshLayout继承自ViewGroup,它通过监听子View的滚动事件,实现...
- **内存管理**:注意及时释放数据源和监听器,防止内存泄漏。 - **适配性**:考虑不同屏幕尺寸和分辨率,确保在各种设备上表现良好。 总结,"Android-PickerView-master" 是一个针对 Android 平台的高效、可定制的...
这通常通过设置监听器或者使用特定的装饰器(Decorator Pattern)来实现。当用户在EditText中输入内容时,系统会自动触发验证过程,并根据验证结果更新UI,如显示错误提示或改变EditText的样式。 此外,"android-...
以下是`Android-ANR-WatchDog`的一些关键特点和使用方法: 1. **自定义超时**:开发者可以设置一个自定义的超时时间,超过这个时间限制,若主线程未进行任何操作,看门狗就会认为出现了ANR。 2. **异常处理**:当...
3. **配置和设置**:初始化PullToRefreshLayout,并设置适配器和监听器。 4. **自定义UI**:根据需要,创建并设置自定义的刷新头部和尾部布局。 5. **实现刷新逻辑**:在OnRefreshListener中实现刷新数据的方法,...