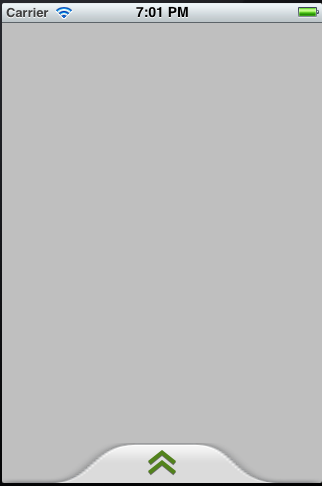
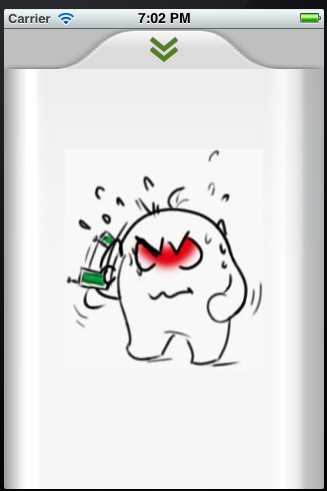
好像最近,看到好多Android上的抽屉效果,也忍不住想要自己写一个。在Android里面可以用SlidingDrawer,很方便的实现。IOS上面就只有自己写了。其实原理很简单就是 UIView 的移动,和一些手势的操作。
//
//  DrawerView.h
//  DrawerDemo
//
//  Created by Zhouhaifeng on 12-3-27.
//  Copyright (c) 2012年 CJLU. All rights reserved.
//

#import <UIKit/UIKit.h>

typedef enum
{
    DrawerViewStateUp = 0,
    DrawerViewStateDown
}DrawerViewState;

@interface DrawerView : UIView<UIGestureRecognizerDelegate>
{
    UIImageView *arrow;         //向上拖拽时显示的图片

    CGPoint upPoint;            //抽屉拉出时的中心点
    CGPoint downPoint;          //抽屉收缩时的中心点

    UIView *parentView;         //抽屉所在的view
    UIView *contentView;        //抽屉里面显示的内容

    DrawerViewState drawState;  //当前抽屉状态
}

- (id)initWithView:(UIView *) contentview parentView :(UIView *) parentview;
- (void)handlePan:(UIPanGestureRecognizer *)recognizer;
- (void)handleTap:(UITapGestureRecognizer *)recognizer;
- (void)transformArrow:(DrawerViewState) state;

@property (nonatomic,retain) UIView *parentView;
@property (nonatomic,retain) UIView *contentView;
@property (nonatomic,retain) UIImageView *arrow;
@property (nonatomic) DrawerViewState drawState;

@end
//
//  DrawerView.m
//  DrawerDemo
//
//  Created by Zhouhaifeng on 12-3-27.
//  Copyright (c) 2012年 CJLU. All rights reserved.
//

#import "DrawerView.h"

@implementation DrawerView
@synthesize contentView,parentView,drawState;
@synthesize arrow;

- (id)initWithView:(UIView *) contentview parentView :(UIView *) parentview;
{
    self = [super initWithFrame:CGRectMake(0,0,contentview.frame.size.width, contentview.frame.size.height+40)];
    if (self) {
        // Initialization code
        contentView = contentview;
        parentView = parentview;

        //一定要开启
        [parentView setUserInteractionEnabled:YES];

        //嵌入内容区域的背景
        UIImage *drawer_bg = [UIImage imageNamed:@"drawer_content.png"];
        UIImageView *view_bg = [[UIImageView alloc]initWithImage:drawer_bg];
        [view_bg setFrame:CGRectMake(0,40,contentview.frame.size.width, contentview.bounds.size.height+40)];
        [self addSubview:view_bg];

        //头部拉拽的区域背景
        UIImage *drawer_handle = [UIImage imageNamed:@"drawer_handlepng.png"];
        UIImageView *view_handle = [[UIImageView alloc]initWithImage:drawer_handle];
        [view_handle setFrame:CGRectMake(0,0,contentview.frame.size.width,40)];
        [self addSubview:view_handle];

        //箭头的图片
        UIImage *drawer_arrow = [UIImage imageNamed:@"drawer_arrow.png"];
        arrow = [[UIImageView alloc]initWithImage:drawer_arrow];
        [arrow setFrame:CGRectMake(0,0,28,28)];
        arrow.center = CGPointMake(contentview.frame.size.width/2, 20);
        [self addSubview:arrow];

        //嵌入内容的UIView
        [contentView setFrame:CGRectMake(0,40,contentview.frame.size.width, contentview.bounds.size.height+40)];
        [self addSubview:contentview];

        //移动的手势
        UIPanGestureRecognizer *panRcognize=[[UIPanGestureRecognizer alloc] initWithTarget:self action:@selector(handlePan:)];
        panRcognize.delegate=self;
        [panRcognize setEnabled:YES];
        [panRcognize delaysTouchesEnded];
        [panRcognize cancelsTouchesInView];

        [self addGestureRecognizer:panRcognize];

        //单击的手势
        UITapGestureRecognizer *tapRecognize = [[UITapGestureRecognizer alloc]initWithTarget:self action:@selector(handleTap:)];
        tapRecognize.numberOfTapsRequired = 1;
        tapRecognize.delegate = self;
        [tapRecognize setEnabled :YES];
        [tapRecognize delaysTouchesBegan];
        [tapRecognize cancelsTouchesInView];

        [self addGestureRecognizer:tapRecognize];

        //设置两个位置的坐标
        downPoint = CGPointMake(parentview.frame.size.width/2, parentview.frame.size.height+contentview.frame.size.height/2-40);
        upPoint = CGPointMake(parentview.frame.size.width/2, parentview.frame.size.height-contentview.frame.size.height/2-40);
        self.center =  downPoint;

        //设置起始状态
        drawState = DrawerViewStateDown;
    }
    return self;
}


#pragma UIGestureRecognizer Handles
/*
 *  移动图片处理的函数
 *  @recognizer 移动手势
 */
- (void)handlePan:(UIPanGestureRecognizer *)recognizer {


    CGPoint translation = [recognizer translationInView:parentView];
    if (self.center.y + translation.y < upPoint.y) {
        self.center = upPoint;
    }else if(self.center.y + translation.y > downPoint.y)
    {
        self.center = downPoint;
    }else{
        self.center = CGPointMake(self.center.x,self.center.y + translation.y);
    }
    [recognizer setTranslation:CGPointMake(0, 0) inView:parentView];

    if (recognizer.state == UIGestureRecognizerStateEnded) {
        [UIView animateWithDuration:0.75 delay:0.15 options:UIViewAnimationOptionCurveEaseOut animations:^{
                if (self.center.y < downPoint.y*4/5) {
                    self.center = upPoint;
                    [self transformArrow:DrawerViewStateUp];
                }else
                {
                    self.center = downPoint;
                    [self transformArrow:DrawerViewStateDown];
                }

        } completion:nil];

    }
}

/*
 *  handleTap 触摸函数
 *  @recognizer  UITapGestureRecognizer 触摸识别器
 */
-(void) handleTap:(UITapGestureRecognizer *)recognizer
{
        [UIView animateWithDuration:0.75 delay:0.15 options:UIViewAnimationOptionTransitionCurlUp animations:^{
            if (drawState == DrawerViewStateDown) {
                self.center = upPoint;
                [self transformArrow:DrawerViewStateUp];
            }else
            {
                self.center = downPoint;
                [self transformArrow:DrawerViewStateDown];
            }
        } completion:nil];

}

/*
 *  transformArrow 改变箭头方向
 *  state  DrawerViewState 抽屉当前状态
 */
-(void)transformArrow:(DrawerViewState) state
{
        //NSLog(@"DRAWERSTATE :%d  STATE:%d",drawState,state);
        [UIView animateWithDuration:0.3 delay:0.35 options:UIViewAnimationOptionCurveEaseOut animations:^{
           if (state == DrawerViewStateUp){
                    arrow.transform = CGAffineTransformMakeRotation(M_PI);
                }else
                {
                     arrow.transform = CGAffineTransformMakeRotation(0);
                }
        } completion:^(BOOL finish){
               drawState = state;
        }];


}

@end


这样就是实现了,图片是从360里面抠出来,处理的不是很好,大家见谅。
Demo的下载地址:http://download.csdn.net/detail/toss156/4177553
分享到:


相关推荐
在iOS开发中,"抽屉效果"是一种常见的交互设计,它允许用户通过滑动手势从屏幕边缘拉出一个额外的视图,这种效果类似于Android的状态栏。这种效果可以用于显示更多的菜单选项、设置或者信息,增加了用户体验的深度和...
在iOS应用开发中,UI抽屉效果是一种常见的交互设计,它允许用户通过滑动手势从屏幕边缘拉出或隐藏一个视图,常用于导航菜单、设置面板等场景。"猫猫学ios UI抽屉效果"这个教程可能涵盖了如何在iOS应用中实现这种效果...
在iOS中,有多种手势可供选择,如`UIPanGestureRecognizer`(拖动手势)适合实现抽屉效果。当用户在屏幕上进行滑动操作时,`UIPanGestureRecognizer`会监听这些手势,并调用相应的处理方法。在这个方法里,我们可以...
"ios效果较好的抽屉"这个标题暗示我们这里涉及的是一个实现高效能、良好用户体验的iOS抽屉效果的代码库或框架。描述中提到的“两种动画形式”和“支持拖拽”意味着该库可能提供了多种交互方式,使得用户可以通过滑动...
本文实例介绍了iOS实现左右拖动抽屉效果,具体内容如下 利用了触摸事件滑动 touchesMoved: 来触发左右视图的出现和消失 利用loadView方法中添加view 在self.view载入前就把 左右中View都设置好frame 每一个方法都由...
在iOS应用开发中,抽屉效果(通常称为侧滑菜单或者抽屉导航)是一种常见的设计模式,它允许用户从屏幕边缘滑动以显示隐藏的菜单或内容区域。在这个名为"ios-swift写的抽屉.zip"的压缩包中,我们可以推测包含了一个...
【iOS天猫抽屉】是一个专为初学者设计的项目,旨在教授如何在iOS应用中实现类似天猫App的抽屉效果。这个项目具有清晰的代码逻辑,非常适合初学者进行学习和实践,以提升自己的iOS开发技能。 抽屉效果,也称为侧滑...
在iOS开发中,实现抽屉动画通常用于创建滑动式导航菜单或侧边栏效果,让用户可以像拉开抽屉一样从屏幕边缘滑出一个视图。`CGAffineTransform`是Core Graphics框架的一部分,它允许开发者对 UIView 或CALayer进行平移...
除了基本的frame动画,还可以通过修改transform属性来实现更复杂的抽屉效果,比如使用`CGAffineTransformMakeTranslation`进行平移变换,或者结合`CGAffineTransformMakeScale`进行缩放,使得抽屉在滑出时有放大或...
综上所述,"ios-Draw-LeftOrRight.zip"包含了一个实现iOS抽屉效果的项目。通过研究该项目的源代码,开发者可以学习到如何使用手势识别、视图动画、自定义容器视图控制器等技术来构建类似的功能。同时,利用GitHub...
以上就是使用约100行代码实现iOS抽屉效果的基本步骤。在实际项目中,可能还需要考虑动画的平滑性、手势冲突的处理以及不同设备尺寸的适配等问题。通过这个简单的实现,开发者可以进一步扩展功能,比如加入更多交互...
滑动菜单,也被称为抽屉式菜单或侧滑菜单,是移动应用和网页设计中常见的一种交互元素。这种菜单在屏幕边缘隐藏,当用户向指定方向滑动时,它可以滑出显示更多的选项或功能。在Android和iOS平台上,滑动菜单被广泛...
本项目"高仿IOS“网易新闻”客户端"就是一个很好的示例,它旨在模仿iOS平台上的网易新闻客户端,特别是其首页左右滑动的交互功能以及在iOS 6和iOS 7上不同的拖动效果。这一设计不仅考验了开发者的技术实力,还要求对...
在iOS应用开发中,UI(用户界面)的设计至关重要,其中“抽屉效果”是一种常见的交互模式,常常用于实现侧滑菜单或者隐藏面板的展示。这个"swift-强大的抽屉效果的类"很可能是为开发者提供了一个便捷的解决方案,...
在Android开发中,SlidingDrawer是一个非常常见的组件,它提供了类似抽屉的滑动效果,通常用于隐藏或显示一些内容。然而,原生的SlidingDrawer仅支持上下两个方向的滑动,对于需要自定义更多方向(如左右)的需求,...
7. **边缘滑动(Edge Pan)手势**:`UIScreenEdgePanGestureRecognizer`是一种特殊类型的手势,用于检测用户从屏幕边缘的滑动,通常用于实现侧滑抽屉效果。 在iOS开发中,为每个手势创建对应的识别器后,需要将其...
2. **iOS实现**: 创建一个自定义视图控制器,用`UIPanGestureRecognizer`监听滑动手势,然后调整抽屉视图的位置: ```swift let drawerView = UIView() view.addSubview(drawerView) let panGesture = ...
侧边栏抽屉效果不少,但是我这个还是有一些不同的。目前默认的效果有点类似网易新闻客户端,可以很方便的改为其他效果。 默认支持左和右两个控制器 支持修改滑动距离、是否开启手势拖拽、是否显示阴影等。 动画...
在Android开发中,自定义布局可以帮助开发者实现特定的交互效果或功能,这里显然是为了实现滑动打开和关闭左侧菜单的功能。`DragLayout`可能会监听用户的触摸事件,当用户在屏幕边缘滑动时,它会响应并滑出隐藏的...