[root@localhost opsdev]# nginx -vTengine version: Tengine/2.0.3 (nginx/1.4.7)[root@localhost opsdev]# cat /etc/redhat-releaseCentOS release 6.4 (Final)[root@localhost opsdev]# uwsgi -vuwsgi: option requires an argument -- 'v'getopt_long() error[root@localhost opsdev]# uwsgi --version2.0.9[root@localhost opsdev]# django -v-bash: django: command not found[root@localhost opsdev]# python -c "import django;print (django.get_version())"1.7.2[root@localhost opsdev]#[root@localhost opsdev]# python -VPython 2.7.6
[root@localhost tmp]# yum install pcre pcre-devel -y[root@localhost tmp]# tar xf tengine-2.0.3.tar.gz[root@localhost tmp]# cd tengine-2.0.3[root@localhost tmp]# ./configure --prefix=/usr/local/nginx --conf-path=/etc/nginx/nginx.conf --error-log-path=/var/log/nginx/error.log --http-log-path=/var/log/nginx/access.log --with-http_stub_status_module --with-pcre --with-file-aio --with-http_flv_module --with-http_gzip_static_module --http-client-body-temp-path=/var/tmp/nginx/client/ --http-proxy-temp-path=/var/tmp/nginx/proxy/ --http-fastcgi-temp-path=/var/tmp/nginx/fcgi/ --http-uwsgi-temp-path=/var/tmp/nginx/uwsgi --http-scgi-temp-path=/var/tmp/nginx/scgi[root@localhost tmp]# make && make install
-
相关选项
-
12345678910111213141516171819202122
--prefix=/usr/local/nginx安装目录--conf-path=/etc/nginx/nginx.conf配置文件存放位置--error-log-path=/var/log/nginx/error.log错误日志存放位置--http-log-path=/var/log/nginx/access.log访问日志存放的位置--with-http_ssl_module启用SSL认证模块--with-http_flv_module启用流媒体模块--with-http_gzip_static_module启用静态页面压缩--http-client-body-temp-path=/var/tmp/nginx/client/HTTP包体存放的临时目录--http-proxy-temp-path=/var/tmp/nginx/proxy/定义从后端服务器接收的临时文件的存放路径,可以为临时文件路径定义至多三层子目录的目录树--http-fastcgi-temp-path=/var/tmp/nginx/fcgi/接收到FastCGI服务器数据,临时存放于本地某目录--with-pcre启动正则表达式rewrite模块 -
添加nginx二进制路径到PATH
[root@localhost tengine-2.0.3]# vim /etc/profile.d/nginx.sh[root@localhost tengine-2.0.3]# cat /etc/profile.d/nginx.shexport PATH=$PATH:/usr/local/nginx/sbin/[root@localhost tengine-2.0.3]# source /etc/profile.d/nginx.sh[root@localhost tengine-2.0.3]# nginx -vTengine version: Tengine/2.0.3 (nginx/1.4.7)
-
导出头文件
[root@localhost tengine-2.0.3]# ln -sv /usr/local/nginx/include/ /usr/include/nginx`/usr/include/nginx' -> `/usr/local/nginx/include/'
-
为tengine提供Sysv服务脚本
#!/bin/sh## nginx - this script starts and stops the nginx daemin## chkconfig: - 85 15# description: Nginx is an HTTP(S) server, HTTP(S) reverse \# proxy and IMAP/POP3 proxy server# processname: nginx# config: /usr/local/nginx/conf/nginx.conf# pidfile: /usr/local/nginx/logs/nginx.pid# Source function library.. /etc/rc.d/init.d/functions# Source networking configuration.. /etc/sysconfig/network# Check that networking is up.[ "$NETWORKING" = "no" ] && exit 0nginx="/usr/local/nginx/sbin/nginx"prog=$(basename $nginx)NGINX_CONF_FILE="/etc/nginx/nginx.conf"lockfile=/var/lock/subsys/nginxstart() {[ -x $nginx ] || exit 5[ -f $NGINX_CONF_FILE ] || exit 6echo -n $"Starting $prog: "daemon $nginx -c $NGINX_CONF_FILEretval=$?echo[ $retval -eq 0 ] && touch $lockfilereturn $retval}stop() {echo -n $"Stopping $prog: "killproc $prog -QUITretval=$?echo[ $retval -eq 0 ] && rm -f $lockfilereturn $retval}restart() {configtest || return $?stopstart}reload() {configtest || return $?echo -n $"Reloading $prog: "killproc $nginx -HUPRETVAL=$?echo}force_reload() {restart}configtest() {$nginx -t -c $NGINX_CONF_FILE}rh_status() {status $prog}rh_status_q() {rh_status >/dev/null 2>&1}case "$1" instart)rh_status_q && exit 0$1;;stop)rh_status_q || exit 0$1;;restart|configtest)$1;;reload)rh_status_q || exit 7$1;;force-reload)force_reload;;status)rh_status;;condrestart|try-restart)rh_status_q || exit 0;;*)echo $"Usage: $0 {start|stop|status|restart|condrestart|try-restart|reload|force-reload|configtest}"exit 2esac
-
把该脚本放到/etc/init.d目录下并赋予该脚本权限
[root@localhost tmp]# mv nginx /etc/init.d/nginx[root@localhost tmp]# chmod +x /etc/init.d/nginx
-
添加到开机启动项并启动服务
[root@localhost tmp]# chkconfig --add nginx[root@localhost tmp]# chkconfig --level 35 nginx on[root@localhost tmp]# chkconfig --list | grep nginxnginx 0:off 1:off 2:off 3:on 4:off 5:on 6:off[root@localhost tmp]#
-
启动服务
[root@localhost init.d]# service nginx restartthe configuration file /etc/nginx/nginx.conf syntax is okconfiguration file /etc/nginx/nginx.conf test is successfulStopping nginx: [ OK ]Starting nginx: [ OK ][root@localhost init.d]# ss -tunlp | grep 80tcp LISTEN 0 128 *:80 *:* users:(("nginx",7602,6),("nginx",7604,6))[root@localhost init.d]#
commands = {name: 'django.core' for name in find_commands(__path__[0])}^SyntaxError: invalid syntax
-
我们这里安装python 2.7.5
[root@localhost tmp]# wget --no-check-certificate[root@localhost tmp]# tar -xzvf Python-2.7.5.tgz[root@localhost tmp]# cd Python-2.7.5[root@localhost Python-2.7.5]# ./configure[root@localhost Python-2.7.5]# make && make install[root@localhost Python-2.7.5]# mv /usr/bin/python /usr/bin/python.bak[root@localhost Python-2.7.5]# ln -s /usr/local/bin/python2.7 /usr/bin/python
-
修复yum,修改后/usr/bin/yum第一行如下所示
[root@localhost tmp]# vim /usr/bin/yum#!/usr/bin/python2.6
-
安装pip(如果你更新python之前安装过pip,这个时候多半是不能用的,建议从官网从新下载安装)
Traceback (most recent call last):File "/usr/bin/pelican-quickstart", line 5, in <module>from pkg_resources import load_entry_pointImportError:No module named pkg_resources
重新安装setuptools和pip即可解决
-
安装django
[root@localhost ~]# pip install django
-
创建项目(在nginx定义的目录下面)
[root@localhost www]# django-admin startproject opsdev
-
安装uwsgi
[root@localhost opsdev]# pip install uwsgi
-
测试
#test.pydef application(env,start_response):start_response('200 OK',[('Content-Type','text/html')])return ["hello world"]
-
运行并查看结果
uwsgi:uwsgi --http :9090 --wsgi-file test.py
-
创建django_wsgi.py文件(和mange.py同级目录)
[root@localhost opsdev]# lsdb.sqlite3 django_wsgi.py manage.py opsdevdjango_wsgi.pyc media static[root@localhost opsdev]# cat django_wsgi.py#!/usr/bin/env python# coding: utf-8import osimport sys# 将系统的编码设置为UTF8#reload(sys)#sys.setdefaultencoding('utf8')#注意:"mysite.settings" 和项目文件夹对应。os.environ.setdefault("DJANGO_SETTINGS_MODULE", "opsdev.settings")#from django.core.handlers.wsgi import WSGIHandler#application = WSGIHandler()# 上面两行测试不对,然后从stackflow上面看到了下面两行,测试okfrom django.core.wsgi import get_wsgi_applicationapplication = get_wsgi_application()[root@localhost opsdev]#
-
创建django_socket.xml文件(和mange.py同级目录)
[root@localhost opsdev]# cat django_socket.xml<uwsgi><socket>127.0.0.1:8077</socket><!-- 和nginx中定义的要一致 --><chdir>/www/opsdev</chdir><!-- 你django的项目目录 --><module>django_wsgi</module><!-- 名称为刚才上面定义的py文件名 --><processes>4</processes><!-- 进程数 --><daemonize>/var/log/uwsgi.log</daemonize></uwsgi>[root@localhost opsdev]# lsdb.sqlite3 django_wsgi.py manage.py opsdevdjango_socket.xml django_wsgi.pyc media static[root@localhost opsdev]#
-
验证是否能够正常访问
[root@localhost opsdev]# uwsgi --http :8000 --chdir /www/opsdev/ --wsgi-file django_wsgi.py*** Starting uWSGI 2.0.9 (64bit) on [Thu Jan 8 12:21:15 2015] ***compiled with version: 4.4.7 20120313 (Red Hat 4.4.7-11) on 07 January 2015 23:29:52os: Linux-2.6.32-358.el6.x86_64 #1 SMP Fri Feb 22 00:31:26 UTC 2013nodename: localhost.localdomain
-
如果上面没有出错,就说明uwsgi和django结合完毕
location / {include uwsgi_params;uwsgi_pass 127.0.0.1:8077;}location /static/ {alias /www/opsdev/static/;index index.html index.htm;}location /media/ {alias /www/opsdev/media/;}
-
启动uwsgi
[root@localhost opsdev]# uwsgi -x django_socket.xml[uWSGI] parsing config file django_socket.xml[root@localhost opsdev]#
-
启动nginx
[root@localhost opsdev]# service nginx startStarting nginx: [ OK ][root@localhost opsdev]#
-
查看进程
[root@localhost opsdev]# ss -tunlpNetid State Recv-Q Send-Q Local Address:Port Peer Address:Porttcp LISTEN 0 100 127.0.0.1:8077 *:* users:(("uwsgi",25703,3),("uwsgi",25704,3),("uwsgi",25705,3),("uwsgi",25706,3))tcp LISTEN 0 128 *:80 *:* users:(("nginx",26427,6),("nginx",26429,6))
-
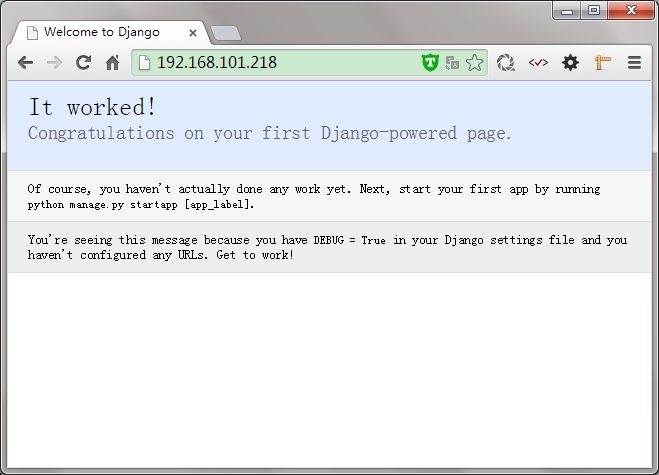
查看结果
-
-
uwsgi: invalid option -- 'x' getopt_long() error
-
“The translation infrastructure cannot be initialized before the ”
django.core.exceptions.AppRegistryNotReady: The translation infrastructure cannot be initialized before the apps registry is ready. Check that you don’t make non-lazy gettext calls at import time.
原来:import django.core.handlers.wsgiapplication = django.core.handlers.wsgi.WSGIHandler()改成:from django.core.wsgi import get_wsgi_applicationapplication = get_wsgi_application()重启一下uwsgi。
-
no python application found, check your startup logs for errorsGET / => generated 21 bytes in 0 msecs (HTTP/1.1 500) 2 headers in 83 bytes (0switches on core 0)
http://stackoverflow.com/questions/22148144/python-importerror-no-module-named-pkg-resources
https://github.com/imelucifer/MyNote/blob/master/django/django%2Buwsgi%2Bnginx%2Bcentos%E9%83%A8%E7%BD%B2.md
http://www.aaini.com/


相关推荐
国密浏览器+tengine+Tongsuo实现国密https离线部署
"使用Tengine+Lua+GraphicsMagick实现图片自动裁剪缩放" 在互联网快速发展的今天,图片数量的增长对网站的性能和用户体验产生了很大的影响。为了解决图片数量的增长带来的问题,我们需要实现图片的自动裁剪和缩放,...
Tengine+Lua+GM安装包是一个集合了三个关键组件的软件解决方案:Tengine、Lua脚本语言和GraphicsMagick。这三个工具在IT领域中都有其特定的用途和重要性,尤其是在服务器性能优化、Web服务扩展以及图像处理方面。 ...
随着互联网的快速发展,针对互联网开发的电商项目越来越来多,比如淘宝、京东等。对于这些网站来说,它们的页面上都有大量的图片需要加载。图片是网站中重要的展现内容,图片的展现力要高于文字,所以无论是PC、移动端...
"Tengine+Lua+GraphicsMagick实现图片自动伸缩功能(ubuntu版)"是一个解决方案,它利用了开源的Web服务器Tengine、脚本语言Lua以及图像处理库GraphicsMagick,旨在动态地根据用户设备和浏览器的需求调整图片尺寸,...
"使用Tengine+Lua+GM实现图片自动裁剪缩放下载资料"是一个关于这一主题的压缩包,其中包含了实现这一功能的相关资源和教程。以下是对这个主题的详细解释: 首先,Tengine是一个高性能、可定制的Web服务器,它是...
最新tomcat7+nginx/tengine+memcached共享session的jar包2016年12月自己更新使用,更新的jar包解决了tomcat7下attribute报错的问题,理论Tomcat8以上版本可用,请自己测试。 asm-5.1.jar kryo-4.0.0.jar kryo-...
Tengine在性能、稳定性和安全性方面经过了淘宝网等大型在线平台的实战检验,它以其高效、功能丰富、安装配置简便以及对系统资源消耗少而著称。 TengineRPM是专为CentOS系统编译打包的RPM安装包,简化了Tengine的...
LLNMP一键安装脚本 通过本脚本可一键自动编译安装 (Open)LiteSpeed + Nginx/Tengine + MySQL/MariaDB + PHP 支持系统: CentOS 5+, Debian 6+, Ubuntu 12+ 32bit/64bit 安装方法: ./install.sh 主页: 博客:
【3-1+Tengine-边缘AI异构计算平台】是一个专注于边缘计算的开源项目,由唐琦(圈圈虫)领导。该项目旨在构建一个广受欢迎的边缘AI计算框架,以便快速对接各种硬件平台,包括CPU、GPU和NPU,以充分利用边缘设备的...
Linux系统中搭建Tengine服务器需要的资源 1.tengine-2.2.0.tar.gz 2.pcre-8.39.tar.gz 3.siege-3.1.4.tar.gz siege是测试工具 以上资源都是源码,都需要make && make install
Tengine WAFF 基于tengine的防攻击模块,最初我尝试了mod-security,但有一个bug,在大并发的时候狂吃内存,直到拖垮应用,不后来转向ngx_lua_waf(感谢loveshell),并在此基础上做了改良,觉得效果不错,就推荐给...
Tengine是一款基于Nginx核心并扩展了许多功能的开源Web服务器。它的设计目的是为了更好地服务于大型网站和高并发环境,提供了更高的性能、稳定性和一系列针对中国互联网环境优化的特性。Tengine是由淘宝网发起的开源...
标题 "tengine-2.3.2_win64.rar" 提供的是 Tengine 的一个特定版本,即 2.3.2,适用于 Windows 64 位系统的版本。Tengine 是一个基于 Nginx 的高性能 Web 和反向代理服务器,由淘宝网开发并维护,它在 Nginx 的基础...
1. 大型电商平台:由于Tengine的高性能和稳定性,特别适合于处理大量并发请求的电商网站,如淘宝网本身就是在使用Tengine。 2. 内容分发网络(CDN):Tengine的负载均衡和防盗链功能,使其成为CDN服务的理想选择。 ...
Tengine是淘宝团队基于Nginx开发的一款高性能的Web服务器/反向代理服务器,它包含了Nginx的所有功能,并在性能、稳定性和功能扩展性上进行了优化。标题提到的"Tengine2.1.2"是该软件的一个特定版本,这个版本包含了...
【Tengine服务器快速搭建方法 云服务器一键安装LTMP(TengineRPM一键安装)】 Tengine是一个基于Nginx的Web服务器项目,由淘宝网发起...无论是个人项目还是企业级应用,Tengine+LTMP的组合都是一个值得考虑的优秀选择。
Tengine是由淘宝发起的Web服务器项目。它在Nginx的基础上,针对大访问量网站的需求,添加了很多高级功能和特性。Tengine的性能和稳定性已经在大型的网站如淘宝,天猫,优酷,全球速卖通,Lazada,阿里云等得到了很好...