就是一个Helloworld ,看项目名 忍不住了 唉 只因
<context:component-scan base-package="com.ds.web"/>
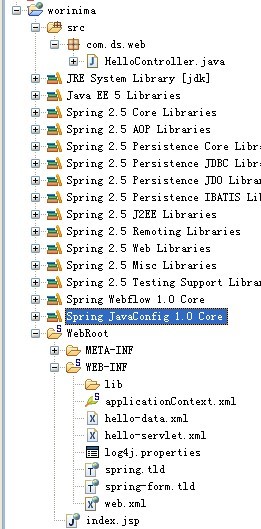
中 com.ds.web -------------------------cn.ds.web 做人要小心 做男人更要小心
Spring MVC 第一个Helloworld
首先 我们先把添加Spring2.5支持,配置Web.xml
<!--<br />
<br />
Code highlighting produced by Actipro CodeHighlighter (freeware)<br />
http://www.CodeHighlighter.com/<br />
<br />
--> 1 <?xml version="1.0" encoding="UTF-8"?>
2 <web-app version="2.5" xmlns="http://java.sun.com/xml/ns/javaee"
3 xmlns:xsi="http://www.w3.org/2001/XMLSchema-instance"
4 xsi:schemaLocation="http://java.sun.com/xml/ns/javaee
5 http://java.sun.com/xml/ns/javaee/web-app_2_5.xsd">
6 <context-param>
7 <param-name>contextConfigLocation</param-name>
8 <param-value>
9 /WEB-INF/hello-data.xml /WEB-INF/applicationContext.xml
10 </param-value>
11 </context-param>
12
13 <!-- Spring 容器启动监听器 -->
14 <listener>
15 <listener-class>
16 org.springframework.web.context.ContextLoaderListener
17 </listener-class>
18 </listener>
19
20 <!-- 编码过滤器 -->
21 <filter>
22 <filter-name>CharacterEncodingFilter</filter-name>
23 <filter-class>
24 org.springframework.web.filter.CharacterEncodingFilter
25 </filter-class>
26 <init-param>
27 <param-name>encoding</param-name>
28 <param-value>UTF-8</param-value>
29 </init-param>
30 <init-param>
31 <param-name>forceEncoding</param-name>
32 <param-value>true</param-value>
33 </init-param>
34 </filter>
35 <filter-mapping>
36 <filter-name>CharacterEncodingFilter</filter-name>
37 <url-pattern>/*</url-pattern>
38 </filter-mapping>
39
40
41
42 <!-- Spring MVC -->
43 <servlet>
44 <servlet-name>hello</servlet-name>
45 <servlet-class>
46 org.springframework.web.servlet.DispatcherServlet
47 </servlet-class>
48 <load-on-startup>0</load-on-startup>
49 </servlet>
50 <servlet-mapping>
51 <servlet-name>hello</servlet-name>
52 <url-pattern>*.htm</url-pattern>
53 </servlet-mapping>
54
55 <session-config>
56 <session-timeout>60</session-timeout>
57 </session-config>
58
59 <welcome-file-list>
60 <welcome-file>index.jsp</welcome-file>
61 </welcome-file-list>
62 </web-app>
63
再来 写个controller
<!--<br />
<br />
Code highlighting produced by Actipro CodeHighlighter (freeware)<br />
http://www.CodeHighlighter.com/<br />
<br />
--> 1 package com.ds.web;
2
3 import java.io.IOException;
4 import java.io.PrintWriter;
5
6 import javax.servlet.http.HttpServletRequest;
7 import javax.servlet.http.HttpServletResponse;
8
9 import org.springframework.stereotype.Controller;
10 import org.springframework.web.bind.annotation.RequestMapping;
11
12
13
14
15 @Controller
16 @RequestMapping("/hello.htm")
17 public class HelloController {
18
19 @RequestMapping(params = "method=forwardHello")
20 public void forwardHello(HttpServletRequest request,HttpServletResponse response) throws IOException {
21
22 System.out.println(request.getParameter("name")+"成功的使用了HelloWorld");
23
24 PrintWriter out = response .getWriter();
25 response.setContentType("text/html");
26 response.setCharacterEncoding("utf-8");
27 out.write(request.getParameter("name")+"成功的使用了HelloWorld");
28 }
29
30 }
31
第3 配置hello-servlet.xml
<!--<br />
<br />
Code highlighting produced by Actipro CodeHighlighter (freeware)<br />
http://www.CodeHighlighter.com/<br />
<br />
--> 1 <beans xmlns="http://www.springframework.org/schema/beans"
2 xmlns:xsi="http://www.w3.org/2001/XMLSchema-instance"
3 xmlns:p="http://www.springframework.org/schema/p"
4 xmlns:aop="http://www.springframework.org/schema/aop"
5 xmlns:context="http://www.springframework.org/schema/context"
6 xmlns:jee="http://www.springframework.org/schema/jee"
7 xmlns:tx="http://www.springframework.org/schema/tx"
8 xsi:schemaLocation="
9 http://www.springframework.org/schema/aop http://www.springframework.org/schema/aop/spring-aop-2.5.xsd
10 http://www.springframework.org/schema/beans http://www.springframework.org/schema/beans/spring-beans-2.5.xsd
11 http://www.springframework.org/schema/context http://www.springframework.org/schema/context/spring-context-2.5.xsd
12 http://www.springframework.org/schema/jee http://www.springframework.org/schema/jee/spring-jee-2.5.xsd
13 http://www.springframework.org/schema/tx http://www.springframework.org/schema/tx/spring-tx-2.5.xsd">
14
15 <!--视图解析链 -->
16 <bean class="org.springframework.web.servlet.view.InternalResourceViewResolver" p:prefix="/"
17 p:suffix=".jsp" p:viewClass="org.springframework.web.servlet.view.JstlView"/>
18
19 <!-- ②:启动Spring MVC的注解功能,完成请求和注解POJO的映射 -->
20 <bean class="org.springframework.web.servlet.mvc.annotation.AnnotationMethodHandlerAdapter"/>
21
22 <!-- 对Controll组件进行扫描 通常要使用@Autowried(要进行自动bean的自动装配)都要进行一些xml配置可以通过这个标签来简化配置-->
23 <context:component-scan base-package="com.ds.web"/>
24 </beans>
第4 写个jsp
<!--<br />
<br />
Code highlighting produced by Actipro CodeHighlighter (freeware)<br />
http://www.CodeHighlighter.com/<br />
<br />
--> 1 <%@ page language="java" import="java.util.*" pageEncoding="UTF-8"%>
2 <%
3 String path = request.getContextPath();
4 String basePath = request.getScheme()+"://"+request.getServerName()+":"+request.getServerPort()+path+"/";
5 %>
6
7 <!DOCTYPE HTML PUBLIC "-//W3C//DTD HTML 4.01 Transitional//EN">
8 <html>
9 <head>
10 <base href="<%=basePath%>">
11
12 <title>My JSP 'index.jsp' starting page</title>
13 <meta http-equiv="pragma" content="no-cache">
14 <meta http-equiv="cache-control" content="no-cache">
15 <meta http-equiv="expires" content="0">
16 <meta http-equiv="keywords" content="keyword1,keyword2,keyword3">
17 <meta http-equiv="description" content="This is my page">
18 <!--
19 <link rel="stylesheet" type="text/css" href="styles.css">
20 -->
21
22 </head>
23
24 <body>
25 <form action="hello.htm?method=forwardHello" method="post">
26 <span>Text:</span><input type="text" name="name">
27 <input type="submit" value="Submit">
28 </form>
29 </body>
30 </html>
31
OK Run Sucess
分享到:


相关推荐
在Spring 2.5版本中,引入了更加强大的注解驱动开发,大大简化了配置文件,提高了开发效率。让我们深入探讨一下Spring 2.5中的注解驱动技术。 首先,依赖注入是Spring的核心特性,它允许开发者通过接口定义组件间的...
Spring MVC、iBatis 和 Spring 2.5 注解是构建高效、可扩展的企业级 Java 应用程序的常用技术组合。这篇详细的文章将深入探讨这三个组件的核心概念、它们如何协同工作以及如何在实际项目中应用。 首先,Spring MVC ...
Spring 2.5引入了一种基于注解的新方式来驱动Spring MVC框架,使得开发者能够更加简洁、直观地配置和管理控制器。这一变化显著提升了开发效率,减少了XML配置文件的复杂性,同时也使得代码更加模块化。 ### 1. 基于...
在本文中,我们将探讨如何将Direct Web Remoting (DWR) 3.0与Spring 2.5框架整合,并利用注解(Annotation)进行配置。DWR是一个允许JavaScript与Java服务器端进行交互的库,而Spring 2.5引入了对注解的强大支持,...
《精通Spring2.5》是一本深度探讨Spring框架的权威指南,主要针对Spring 2.5版本进行深入解析。Spring是Java企业级应用开发中最受欢迎的框架之一,它以其轻量级、模块化的设计,以及对IoC(Inversion of Control,...
在Spring2.5中,注解如`@Autowired`、`@Service`、`@Repository`和`@Controller`引入了无XML配置的可能性。`@Autowired`自动装配依赖,`@Service`、`@Repository`和`@Controller`分别用于标记业务、数据访问和控制层...
### Spring2.5基于注解开发教程 #### 引言 随着软件开发技术的不断进步,简化配置和提高代码可维护性的需求日益增加。Spring框架作为一款广泛应用于企业级Java应用开发的开源框架,一直以来都在积极地适应这些变化...
### Spring2.5注解(标注)学习笔记 在探讨Spring2.5中常见的四个注解之前,我们先简要回顾一下Spring框架的基本概念。Spring框架是一个轻量级的Java应用开发框架,它通过依赖注入(DI)和面向切面编程(AOP)等...
使用Spring2.5的Autowired实现注释型的IOC , 使用Spring2.5的新特性——Autowired可以实现快速的自动注入,而无需在xml文档里面添加bean的声明,大大减少了xml文档的维护
Spring2.5版本是该框架的一个重要里程碑,它在2008年发布,带来了许多新特性和改进,提升了开发者在构建应用程序时的灵活性和效率。 **依赖注入(DI)和控制反转(IoC)** Spring的核心特性之一是依赖注入(Dependency...
6. **国际化(I18N)**:Spring 2.5提供了更好的国际化支持,包括对`ResourceBundleMessageSource`的改进,使得开发者可以更方便地管理多语言资源。 7. **轻量级HTTP客户端**:Spring 2.5引入了`...
使用 Spring 2.5 基于注解驱动的 Spring MVC 详解 本文将介绍 Spring 2.5 新增的 Spring MVC 注解功能,讲述如何使用注解配置替换传统的基于 XML 的 Spring MVC 配置。 Spring MVC 注解驱动 在 Spring 2.5 中,...
10. **国际化(i18n)支持**:Spring 2.5提供了更好的国际化支持,使得应用可以轻松地根据用户的选择展示不同语言的文本。 以上只是Spring 2.5中部分关键知识点的概述。在实际开发中,了解并熟练运用这些特性,将极...
Spring 2.5大幅扩展了对Java注解的支持,包括`@Autowired`、`@Qualifier`、`@Required`等,这些注解使得开发者可以直接在类和方法上声明依赖,而无需XML配置。这极大地减少了配置文件的复杂性。 3. **AOP(面向切...
通过阅读《Spring2.5-中文参考手册.chm》这份文档,开发者可以深入了解Spring 2.5的各种特性和用法,解决实际开发中遇到的问题,提升开发效率。文档不仅包含详细的API参考,还包含丰富的示例和最佳实践指导,是学习...
"CRM完整版 spring2.5注解+hibernate3.0"是一个专为中级程序员设计的项目,旨在帮助他们深入理解和应用Spring 2.5版本的注解以及Hibernate 3.0 ORM框架。 Spring 2.5是Spring框架的一个里程碑版本,它引入了大量的...
综上所述,这个"spring2.5基于注解的例子程序"涵盖了Spring 2.5的核心特性,包括注解驱动的配置、自动扫描、基于注解的事务管理、AOP支持、MVC框架的使用,以及依赖注入等。通过学习和理解这个例子,开发者可以更好...
Spring 2.5增强了对注解的支持,使得无需XML配置也能实现Bean的声明和注入。 2. **AOP**:Spring的AOP模块提供了一种在不修改代码的情况下,实现横切关注点(如日志、事务管理)的方式。在Spring 2.5中,AOP支持更...
Spring 2.5引入了对注解的强大支持,这些注解在Spring 3.0之后仍然通用,极大地简化了配置并增强了代码的可读性。本文将详细介绍Spring中的一些核心注解及其用法。 首先,要使注解生效,我们需要在Spring配置中注册...